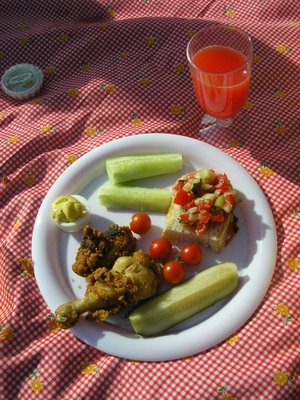
***OVERCONSUMPTION OF FRIED CHICKEN WILL LEAD TO PERPETUALLY GREASY FINGERS AND A TICKER THAT JUST MAY STOP TICKIN'. ENJOY WITH CAUTION. ***
*The amounts given are only estimates. I can't remember all that I put into the batter, so adjust according to your taste and intelligence.
1 whole chicken, @ 3-4 pounds (or 2 two-pounders)
6 cups buttermilk (I used sham buttermilk; 6 tablespoons of lemon juice or white vinegar and enough milk to make 6 cups. Let sit 5 minutes.)
2-3 tablespoons salt, separated
1/3 - 1/2 cup hot red-pepper sauce, optional
3 cups all-purpose flour
1 tablespoon black pepper (more or less)
2 teaspoons cayenne pepper (more or less)
2 tablespoons baking powder
garlic powder (probably lots)
onion powder (probably lots)
a bit of paprika
maybe a sprinkle or two of ground thyme and sage (I can't remember)
Electric fryer or a deep pot
Enough oil or shortening to submerge a few chicken pieces at a time (Peanut oil is great b/c is has a higher smoking temp. than other frying oils, but we usually just use veg. oil.)
1. Separate whole chicken into 8 standard pieces (I usually cut breasts into smaller sections, too, otherwise they don't fully cook in the middle). Combine buttermilk, 1 tablespoon salt, and hot sauce, if desired, in a large airtight container. Add the chicken and turn to coat. Refrigerate overnight.
2. Combine flour and remaining dry ingredients in a large bowl and retain buttermilk mixture for dredging.
3. Heat oil in an electric fryer (to fill line) or a deep pot (enough to submerge chicken pieces completely). Heat oil to about 360-375 degrees. Also, line a baking sheet with a mattress of paper towels and heat oven to 200 degrees.
4. While oil heats, prepare the first batch of chicken pieces for frying. Prepare and fry only a few pieces at a time. Taking a piece out of the buttermilk mixture, dredge it in the dry mixture (coating well), then dip it into the buttermilk mixture a second time before again coating it with dry mixture. The more you repeat this process, the thicker the fried coating will be. (I usually dredge each piece about 2-3 times in wet and dry before frying.)
5. Fry chicken, a few pieces at a time. If too many pieces are added, the oil temp. drops too low. This is the tricky part that made our first few fried chicken dinners less than satisfying. If the oil's too cool, the coating soaks up too much oil and becomes mushy; if the oil is too hot, the coating browns too quickly and the center of the pieces are raw. Fry the larger pieces when the temperature is slightly lower (temperature will drop when pieces are added). Fry the smaller pieces when the temperature is higher, and they will be cooked more quickly. If you see that the coating is browning too quickly, turn down heat or unplug the fryer for a bit. Remove when chicken is golden brown and drain on paper towels. Place finished chicken in the oven to stay warm and crisp while you finish frying the rest
I highly recommend frying only a few pieces first and cutting them open to see if they are fully cooked before going on to the next batch. (Based on sorry personal performance in the past...) If the center of a piece is not cooked, I just pop it in the microwave for less than a minute to finish cooking, but the coating on the bottom of the chicken may turn a bit mushy.
Remember that chicken recipe you gave me a long time ago? I tried it once and it did not turn out anything like yours. For one thing I don't have a fryer-so I just used the stovetop. It was a bit mushy and not at all golden. So-the oil wasn't hot enough? Or maybe I was too nervous I removed them before they had the chance...in any cause, posting this recipe reminded me of the deliciousness of the spicy chicken, so I will try again. Soon.
ReplyDeletecase. Not cause. oops
ReplyDeleteYeah, too-low oil temperature is probably the culprit. I fried our picnic chicken in a big pot on the stove, and, apart from a few problems, it turned out great!
ReplyDelete