Thursday, July 09, 2015

Three-Layer Carrot Cake


I found this recipe in the cookbook my Aunt Sherry gave John and me as a wedding present-- The Complete Guide to Country Cooking published by Taste of Home.  Please don't worry if you're not a Country Cook.  If you're a City Cook, a Bush Cook, a Suburban Culdesac Cook, or any other type of Cook, I can guarantee you'll love this cake if you like carrot cake.  

Studded with raisins and pecans, rich as can be but not overly sweet, and extremely moist, this is the best carrot cake in my repertoire.  My Dad, cake aficionado that he was, approved (though not as hearty an approval as that for THIS cake), and Annika counts it as her favorite cake.

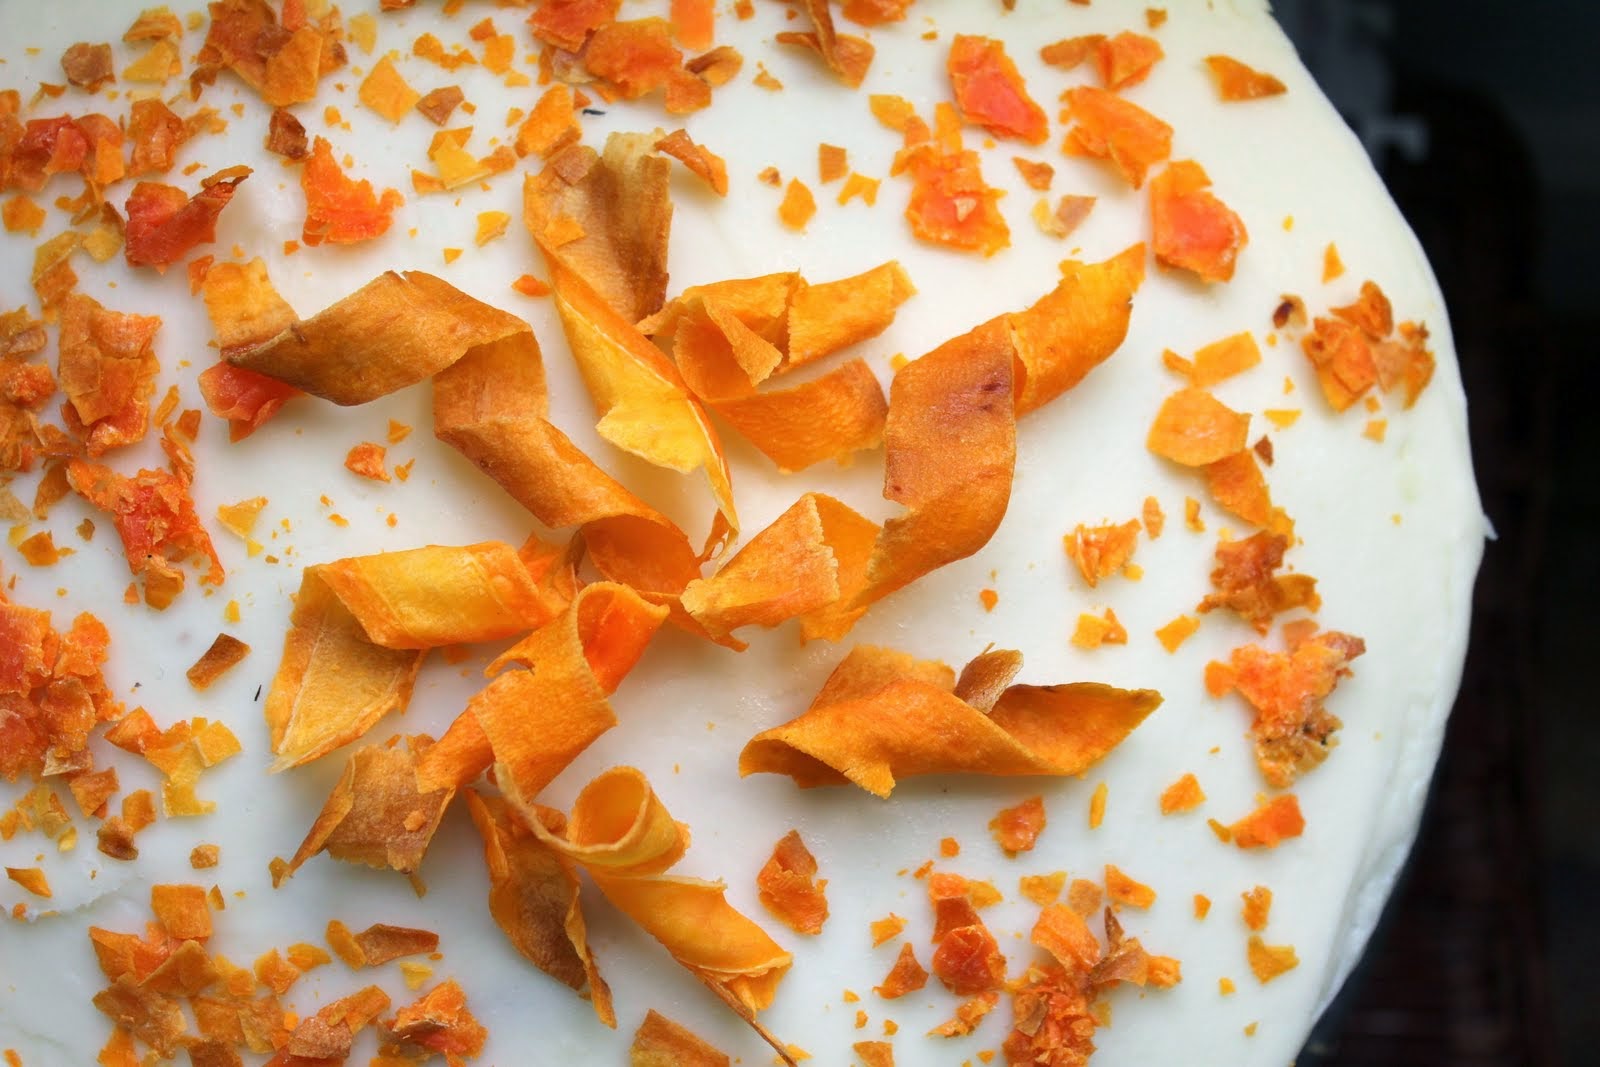
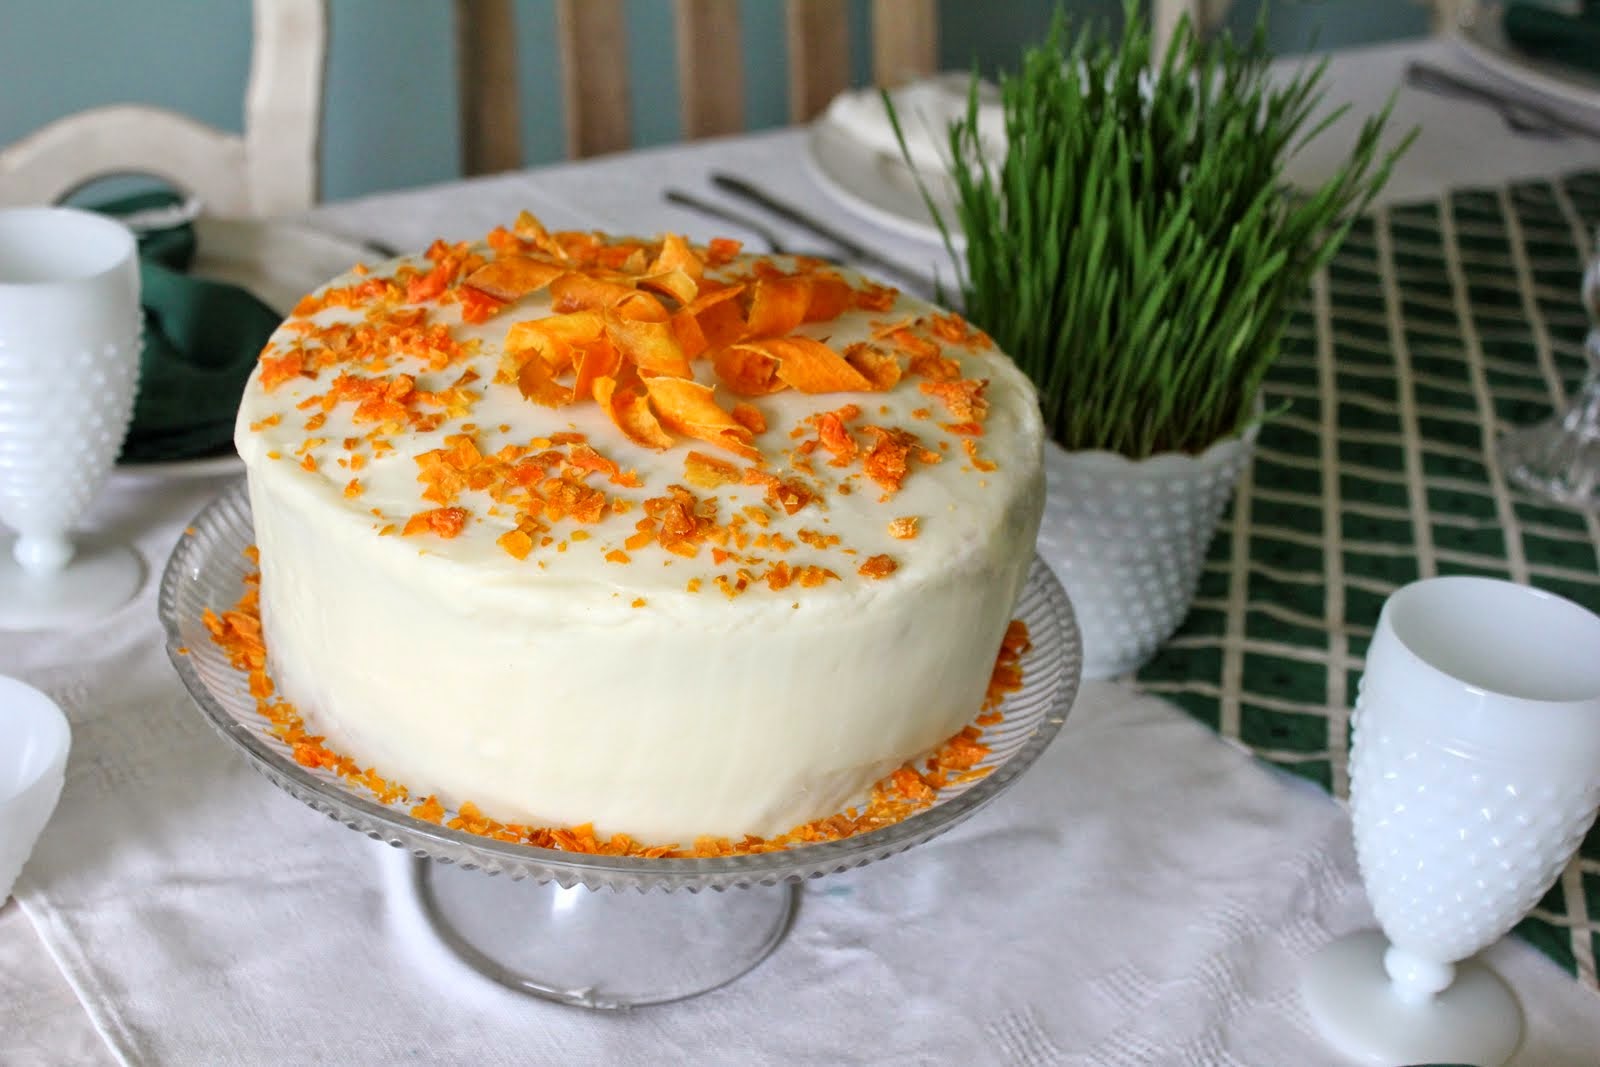
When I made it last Easter, I added a bit more grated carrot to the batter, as well as candied carrot curls and pieces as garnish.  Also, I skipped the recipe's filling and just made extra cream cheese frosting to spread between the layers.  The first time I made this cake, I followed the recipe exactly, and it was very good; I just use any excuse I can to get more cream cheese frosting in my belly. :)

Three-Layer Carrot Cake
 

FILLING: *If desired, omit filling, and make extra cream cheese frosting to use in its place.

  • 1 cup sugar
  • 2 tablespoons all-purpose flour
  • 1/4 teaspoon salt
  • 1 cup heavy whipping cream
  • 1/2 cup butter
  • 1 cup chopped pecans
  • 1 teaspoon vanilla extract

    CAKE:
  • 1-1/4 cups canola oil
  • 2 cups sugar
  • 2 cups all-purpose flour
  • 2 teaspoons ground cinnamon
  • 2 teaspoons baking powder
  • 1 teaspoon baking soda
  • 1 teaspoon salt
  • 4 eggs
  • 4 cups finely shredded carrots (or a bit more; the more finely you shred them, the more they'll incorporate into the cake and the moister the cake will be, so use the finest shredder you have for this)
  • 1 cup raisins
  • 1 cup chopped pecans

    FROSTING: *Make extra if using in place of the filling.
  • 3/4 cup butter, softened
  • One block (8 oz.) cream cheese, softened
  • 1 teaspoon vanilla extract
  • 3 cups confectioners' sugar

    If you want, add candied carrot curls as garnish, recipe to follow.

    Directions

  • In a large heavy saucepan, combine sugar, flour and salt. Stir in cream; add butter. Cook and stir over medium heat until the butter is melted; bring to a boil. Reduce heat. Simmer, uncovered, for 30 minutes, stirring occasionally. Stir in nuts and vanilla. Cool and set aside.
  • In a large bowl, beat oil and sugar until well blended. Combine the flour, cinnamon, baking powder, baking soda and salt; add to the creamed mixture alternately with eggs, beating well after each addition. Stir in the carrots, raisins and nuts.
  • Pour into three greased and floured 9-in. round baking pans. Bake at 350° for 35-40 minutes or until a toothpick inserted near the center comes out clean. Cool in pans 10 minutes before removing to wire racks to cool completely.
  • For frosting, in a small bowl, beat the butter, cream cheese and vanilla until fluffy. Gradually beat in sugar until smooth. Spread filling between cake layers. Frost the sides and top of cake. Store in the refrigerator. 

    Yield:
    16-20 servings.

It's even better a day or two later after having been chilled.  Soooooo good.

Candied Carrot Curls


Candied Carrot Curls, for topping whatever you'd like, or for eating plain (yes, they're good): source recipe here, with a photo tutorial!

Sour Cherry Scones


This began as a great year for cherries until the constant rain ruined most of them, but we were able to squirrel a few quarts away, anyway.  This winter, we'll eat cherry scones with chapped cheeks and noses and remember the glory of mid-spring on Mount Hunger.


Sour Cherry Scones

Note:  These are "sour" cherry scones because we picked ours under-ripe before the birds could steal them.  If you're using larger, sweet cherries, simply chop them up a bit and use less sugar, perhaps 1/2 cup. 

2 cups all-purpose flour
1 cup whole wheat flour
2/3 cup packed brown sugar
1 tbsp. baking powder 
1/2 tsp. baking soda
3/4 cup cold butter
1 cup buttermilk (I use sham buttermilk. Add enough milk to one tbsp. of white vinegar to form one cup; let sit for a few minutes until curdled)
2 cups cherries, pitted and chopped up a bit if large

In a bowl, combine flours, brown sugar, baking powder, and baking soda. Cut in butter until mixture resembles coarse crumbs.  Stir in buttermilk and cherries until a soft dough forms.  On a floured surface, knead gently 10-12 times until no longer sticky.  Divide dough in half; gently pat or roll each half into an 8-in circle 1/2" thick.  Cut each circle into eight wedges.  Separate wedges and place on an ungreased baking sheet and bake at 400 degrees for 15-18 minutes, or until lightly golden.

* Just like with biscuits, a "light" hand will make for lighter scones, so don't overknead it and avoid handling the dough any more than necessary.

Pure Maple Sugar Candy


Near the top of the list of "Favorite Things My Mother Used to Make" is homemade maple sugar candy.  If you've bought some before, you know it's still excellent, but making it at home allows you to control the texture.  Usually, store-bought maple sugar is hard and dry, but if you wish to at home, you can make the consistency more like fudge or even make one of my favorites-- spreadable maple cream.

If you've never had maple sugar candy before, you are missing out!  I should mail you a piece or two.


I'm lifting instructions from the website massmaple.org, because my vague "instructions" will probably annoy people who haven't made candy before.  I do recommend using a large, heavy-bottomed pot, as this distributes heat more evenly.  Also make sure you test (calibrate) your candy thermometer before beginning.  For this batch, I heated the syrup to 240 degrees F before stirring.  The candy was firm and hard, but not completely brittle.  For softer candy, one should boil it to 235 degrees; for harder, brittle candy, boil it to 245 degrees.  The hotter the syrup gets, the faster it will turn color and harden (and also the easier it will scorch!), so be on the lookout for that magic moment while it cools and when you're stirring, when it loses glossiness and begins to look creamy-colored.  When that happens, pour it off into your pan, and it will harden further after a few minutes.  You can then slice it and let it cool completely.

I usually use one quart of maple syrup and pour the finished product into a lightly greased 13 x 9 pan. One quart of syrup yields 2 pounds of candy.


Pure Maple Syrup Candy (instructions copied from here)

1. Fill pan partially with water and the thermometer.
2. Bring to a boil, and note the temperature of the boiling water. Empty the pan.
3. Place syrup in pan; use a deep pan as the boiling syrup will foam up fairly high when boiling.
4. Add a few drops of oil or butter. (This helps to keep foam down).
5. Boil carefully over high heat without stirring, until temperature of the boiling syrup is 32 degrees F above the boiling point of the water, as noted earlier. Watch carefully as the temperature climbs higher. It can get too hot very quickly near the end. If your pan boils over, you'll have a real mess! If it cooks too long it can scorch, even catch fire. Watch it! (This is not a place for children nearby, as the boiling syrup is VERY hot, and can stick and burn).
6. Remove from heat, and let cool for 3-5 minutes.
7. Stir evenly by hand (don't beat) until the liquid loses its gloss and starts to become opaque. This should take a few minutes, and the tricky part is to learn the exact correct moment to pour off. Stir too long and the thickened syrup will "set up" (harden) in the pan. If this happens, add a cup of water, and re-heat slowly to dissolve sugar, then start over. If you don't stir long enough, the sugar may not "set up" in the molds at all.
8. Pour carefully into molds. Small aluminum foil pans can be used.
9. Allow to cool, remove from molds, place on a rack to dry for a few hours...enjoy!

Angel Food Cake: Lemon Curd, Whipped Cream, & Berries


I made this for Mopsy's Mother's Day Feast.  It was the perfect dessert, and it looks lovely, doesn't it?  Remember what lurks behind these snapshots, though.


Angel Food Cake (source: my best buddy Alton Brown)

Ingredients:

1 3/4 cups sugar 
1/4 teaspoon salt 
1 cup cake flour, sifted (I used all-purpose flour, minus 1 tablespoon)
12 egg whites (the closer to room temperature the better) 
RESERVE EGG YOLKS FOR THE LEMON CURD
1/3 cup warm water 
1 teaspoon orange extract, or extract of your choice (I used vanilla)
1 1/2 teaspoons cream of tartar


Directions:

Preheat oven to 350 degrees F. 

In a food processor spin sugar about 2 minutes until it is superfine. Sift half of the sugar with the salt the cake flour, setting the remaining sugar aside. 

In a large bowl, use a balloon whisk to thoroughly combine egg whites, water, extract, and cream of tartar. After 2 minutes, switch to a hand mixer. (I did not switch to a hand mixer, because I am lazy).  Slowly sift the reserved sugar, beating continuously at medium speed. Once you have achieved medium peaks (I beat almost to stiff peaks), sift enough of the flour mixture in to dust the top of the foam. Using a spatula fold in gently. Continue until all of the flour mixture is incorporated. 

Carefully spoon mixture into an ungreased tube pan. Bake for 35 minutes before checking for doneness with a wooden skewer. (When inserted halfway between the inner and outer wall, the skewer should come out dry). 

Cool upside down on cooling rack for at least an hour before removing from pan.  

*Abigail's note: Do not, I repeat, DO NOT, cool your beloved cake inverted over a wine bottle or any other such nonsensical suggestion you find on the misleading internet!  You cake will, I repeat, YOUR CAKE WILL crash.  I repeat, CRASH!  Okay, carry on.

________________________

While cake is baking, prepare the world's yummiest lemon curd.  Recipe here.

________________________

When cake has cooled, carefully slice in half and spread the bottom layer with lemon curd before replacing top layer.  Before serving, prepare whipped cream. Fold as much lemon curd as you wish into the whipped cream, spread onto the top layer, and then garnish with fresh strawberries or blueberries.

Oh, my goodness, yes.  This cake is divine.

Lemon Curd, I Love You


I can't believe I'd never eaten such a delicious thing as lemon curd before.  It is SO GOOD.  Any lovers of lemon will find it hard not to eat plain.  Rich, buttery, bursting with mouth-puckering, sour-sweet flavor, this is something I will certainly add to my holiday fare. Lemon curd can be layered between pudding or whipped cream as a dessert, used as a filling for layer cakes, or, traditionally, spread on toast in lieu of jam, though I've not tried that.

**   Those of you who are here to make the filling for the angel food cake should triple the amounts below.  This will use up all those egg yolks perfectly.  If you have any curd leftover, I found that a spoonful or two stirred into plain homemade yogurt turns it into a knockout dessert, as shown below. Plus, you know, there's always just that empty spoon waiting to be filled. **


Without further ado, a recipe for lemon curd, which I adapted from The Fannie Farmer Cookbook.

Lemon Curd

yield: about 2 cups

Grated zest of 3 large lemons
about 6-7 tbsp. of fresh lemon juice
1/4 lb. (1 stick) butter
1 cup sugar
4 egg yolks 

In a small bowl, stir the yolks until thoroughly blended, then heat the butter and sugar in a saucepan over medium-low heat until butter melts and sugar dissolves.  To the butter/sugar mixture, add the lemon juice and lemon zest.  Stirring constantly, pour the egg mixture into the lemon mixture, and still stirring constantly, continue to cook until the curd is thick.  This may take up to 15 minutes.  Don't increase the heat, as the butter and zest can scorch.  Remove from the heat (curd will thicken more as it cools), cover with plastic wrap against the surface to prevent a "skin" from forming, let cool, and store in the refrigerator.  Curd will keep up to 2 weeks, if you can bear to let it last that long.

* If you're worried about scorching, just use a makeshift double boiler.  Fill a large pan with one inch of water and rest a bowl on top of that, not touching the water, but just above it.  This way the water will heat the curd gently without fear of scorching it with direct heat.  I'm usually too anxious to finish to use this method, though.


Lemon Cheesecake with Raspberry Sauce


Lemon and raspberry were meant to live under one roof-- or in one dessert, as the case may be.  I made this as one of the Easter desserts over a year ago, and it was marvelous.  (Yes, I like lemony desserts for Easter, in case you noticed a theme here.)


Lemon Cheesecake with Raspberry Sauce


Crust:
3 cups crushed graham crackers
1 tsp. ground cinnamon 
1/3 cup butter, melted
 
Combine and mix well in a bowl, then press across the bottom and up the sides of a greased 9-inch springform pan.
Bake in a 350 degree oven for 5 minutes and then cool completely.

Filling:
4 8-ounce packages cream cheese, room temperature
1 cup sugar
2 tablespoons (1/4 stick) butter, melted

2 tbsp. flour
5 large eggs
2 teaspoons vanilla extract

1 tsp. lemon extract
about 6 tbsp. fresh lemon juice
2 tbsp. freshly grated lemon zest (for batter)
an additional 1-2 tbsp. freshly grated lemon zest set aside for garnish, if desired

Topping, if desired:
sour cream (an 8 oz. container is enough)
vanilla extract (start with 1/4 tsp.)
lemon extract (start with 1/4 tsp.)
granulated sugar 
1-2 tbsp. freshly grated lemon zest, previously set aside, for garnish


Beat cream cheese and sugar in a large bowl until smooth. Beat in butter and flour, and then add the eggs one at a time, beating until just combined. Mix in both extracts, the lemon juice, and the zest.  *Don't overbeat the mixture once you've added the eggs. This beats air into the cheesecake batter, which will cause the cheesecake to fall and crack while baking.

Pour cheesecake batter into graham cracker crust and bake in a 350 degree oven for about one hour or until the center is almost set. (Sides should be puffed and set, and center will move slightly when shaken.) Cool in a cracked-open oven for ten minutes. Carefully run a knife around the edge of the pan to loosen the crust. Cool for one more hour and then refrigerate overnight to let the flavors ripen.

For topping, mix together sour cream, vanilla and lemon extracts, and granulated sugar, to taste, until the sugar dissolves.  Set aside with the reserved lemon zest.
 
After cheesecake has completely cooled, spread with the sour cream mixture and sprinkle with lemon zest.  Spoon raspberry sauce over individual slices.

Raspberry Sauce
1 bag frozen raspberries or several cups fresh raspberries 
sugar, to taste
about one tablespoon corn starch dissolved in a small amount of cold water.

Puree the berries (if using frozen, you can just smush with spoon), place in small saucepan, and add the sugar and corn starch. Cook over medium heat, stirring frequently, until the sugar dissolves and the sauce thickens.

Note: If you want to be proper, the pureed or smushed berries should be strained to remove the seeds BEFORE you put them into the saucepan, but I've always just left them in. Cool and refrigerate.

Roasted Cabbage with Balsamic Reduction


Our family loves roasted anything.  What is the magic that makes ANY vegetable irresistible with only olive oil, salt, pepper, and roasting?  I don't know, either, but I'm glad it exists, because we can gobble a whole head of cabbage prepared like this.

In addition to the olive oil and salt, this cabbage is drizzled with a balsamic reduction, which takes it from irresistible to EAT IT NOW!!!!

Roasted Cabbage with Balsamic Reduction
one head of cabbage, outer leaves removed
several tbsp. olive oil
salt and pepper
an oven for roasting

Balsamic Reduction (made speedier by the addition of sugar)
one cup of balsamic vinegar
2 tbsp. of sugar

Preheat oven to 400 degrees.  

Combine the balsamic vinegar and the sugar in a small saucepan over medium-high heat. Stir until the sugar is dissolved and then bring to a boil.  Reduce the heat and allow mixture to simmer, stirring occasionally, until the mixture is reduced by half.  Don't let it scorch when it nears the end.  It should be noticeably thicker now, and it will taste heavenly.

Prepare the cabbage by slicing it from top to bottom into 1-inch thick pieces (you can also cut it into wedges).  Drizzle with several tablespoons of olive oil (or brush oil on both sides), and then sprinkle liberally with salt and pepper.  Bake in the 400 degree oven for about 45-60 minutes, until tender and seared, turning once halfway through.  Toward the end, I drizzle on some of the balsamic reduction, and if the cabbage isn't dark enough for my liking, I just crank up the heat towards the end.  

When done, remove from oven, and top hot cabbage with as much balsamic as you like, which, if you're like me, is more than your fair share.