Showing posts with label Appetizers/Snacks. Show all posts

Thursday, July 09, 2015

Roasted Cabbage with Balsamic Reduction


Our family loves roasted anything.  What is the magic that makes ANY vegetable irresistible with only olive oil, salt, pepper, and roasting?  I don't know, either, but I'm glad it exists, because we can gobble a whole head of cabbage prepared like this.

In addition to the olive oil and salt, this cabbage is drizzled with a balsamic reduction, which takes it from irresistible to EAT IT NOW!!!!

Roasted Cabbage with Balsamic Reduction
one head of cabbage, outer leaves removed
several tbsp. olive oil
salt and pepper
an oven for roasting

Balsamic Reduction (made speedier by the addition of sugar)
one cup of balsamic vinegar
2 tbsp. of sugar

Preheat oven to 400 degrees.  

Combine the balsamic vinegar and the sugar in a small saucepan over medium-high heat. Stir until the sugar is dissolved and then bring to a boil.  Reduce the heat and allow mixture to simmer, stirring occasionally, until the mixture is reduced by half.  Don't let it scorch when it nears the end.  It should be noticeably thicker now, and it will taste heavenly.

Prepare the cabbage by slicing it from top to bottom into 1-inch thick pieces (you can also cut it into wedges).  Drizzle with several tablespoons of olive oil (or brush oil on both sides), and then sprinkle liberally with salt and pepper.  Bake in the 400 degree oven for about 45-60 minutes, until tender and seared, turning once halfway through.  Toward the end, I drizzle on some of the balsamic reduction, and if the cabbage isn't dark enough for my liking, I just crank up the heat towards the end.  

When done, remove from oven, and top hot cabbage with as much balsamic as you like, which, if you're like me, is more than your fair share.

Fresh Mozzarella


There are delicious things with horrendous prices that I've only eaten once or twice, and then only because John bought them.  (I married him for good reasons!)  Fresh mozzarella is one of those things, and he bought some to make this addictive side a long time ago.  There are delicious things in this world that should not have horrendous prices, and mozzarella is one of them.

Now you know why I'm so delighted to know how to make the stuff at home.  I made it for the first time last summer and then gushed about it on shotsnaps because it's all I could think about for a few days.  Mozzarella?  Yummy?  Cheap?  That I can make and eat ANYTIME I WANT?!?!?!  (Right now I have homemade feta ripening in the fridge, and you can bet I'll gush about that, too, if it doesn't poison us a few weeks from now when it's ready.)

Like making bread or yogurt or cold-process soap for the first time, making mozzarella can be intimidating.  Like those things, it's really quite a simple process, however, with just a few steps, and once you taste success once, watch out, because you'll never look back. Trust me.  You're probably making something with ease right now that's loads harder to make than mozzarella.


I only took pictures the first time I made it, but it tastes heavenly every time.


My favorite way to eat it is layered with fresh basil and tomatoes from the garden, drizzled liberally with olive oil and balsamic vinegar and topped with a sprinkle of salt.  This picture is also from last summer, and I sit here waiting on the basil and tomatoes...


I don't want to put forth the effort to give a proper tutorial here when it's not something I made up on my own (but, really, if I had just invented making mozzarella, you can bet my gush would be incrementally more annoying, and I'd shout it from the rooftops), so here's the link to the youtube video I kind of followed to make it the first couple of times.  His method streamlines the process more than traditional mozzarella-making, which takes half the day, so following this method was an easy choice for me. 

Note: When I needed to heat the cheese a bit more during the stretching process, I just plopped it back in the hot water for a few seconds before resuming the stretching.

Spiced Pickled Beets


I wouldn't have touched pickled beets with a ten-foot pole when I was young, but I love them now.  This is one proof among many that I'm an old lady.  If you like beets, you should try these!  Even if you don't like beets, perhaps you should try these... :)

Side note: I recently learned from an expatriate friend and her Kiwi companion that in New Zealand, burgers are traditionally served with a fried egg and pickled beetroot on top.  Yup.  A fried egg and pickled beets.  (And now I'm curious to try it myself.)

Spiced Pickled Beets

29 small beets 
2 1/2 cups apple cider vinegar
1 1/2 cups liquid leftover from cooking beets
2 - 2 1/2 cups sugar
2 sticks cinnamon
1 tbsp. whole cloves, bagged (or strained out later)

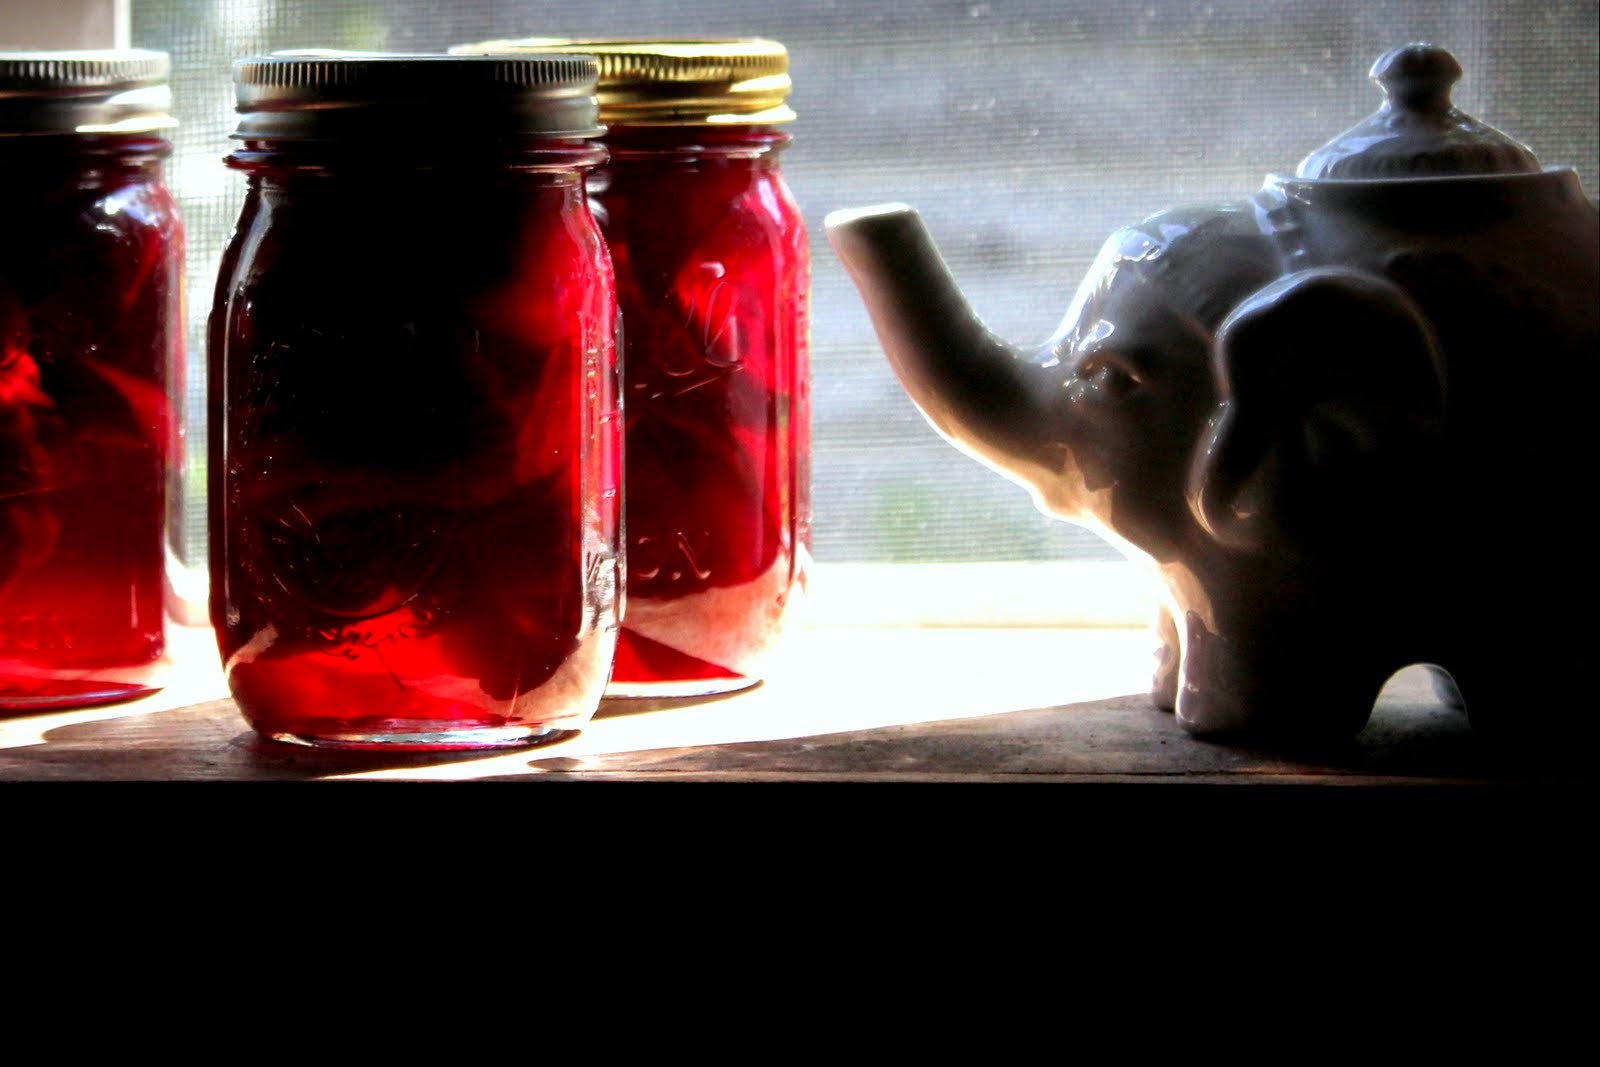
Scrub beets and trim tops.  Cook in boiling water for about 15 minutes or until tender.  If desired, place the cooked beets in ice water to cool more quickly before peeling off the skins and slicing the beets 1/4 " thick.    Heat remaining ingredients and stir until sugar dissolves and mixture boils.  Add the beets and simmer until beets are hot.  Remove the spice bag and cinnamon sticks.  Pack hot beets into clean pint jars to within 1/2 " of the top. Pour the hot liquid over beet slices, leaving 1/2 " headspace.  Adjust lids and process in a boiling water bath for 35 minutes. 

*I always at least double the pickling liquid mixture in order to have enough.  This is probably because my "small" beets are too large and fill more jars than the recipe intends.  I just pop any leftover in the fridge for future beets, and it also can be used as a base for pickled hardboiled eggs.

Dill Refrigerator Pickles


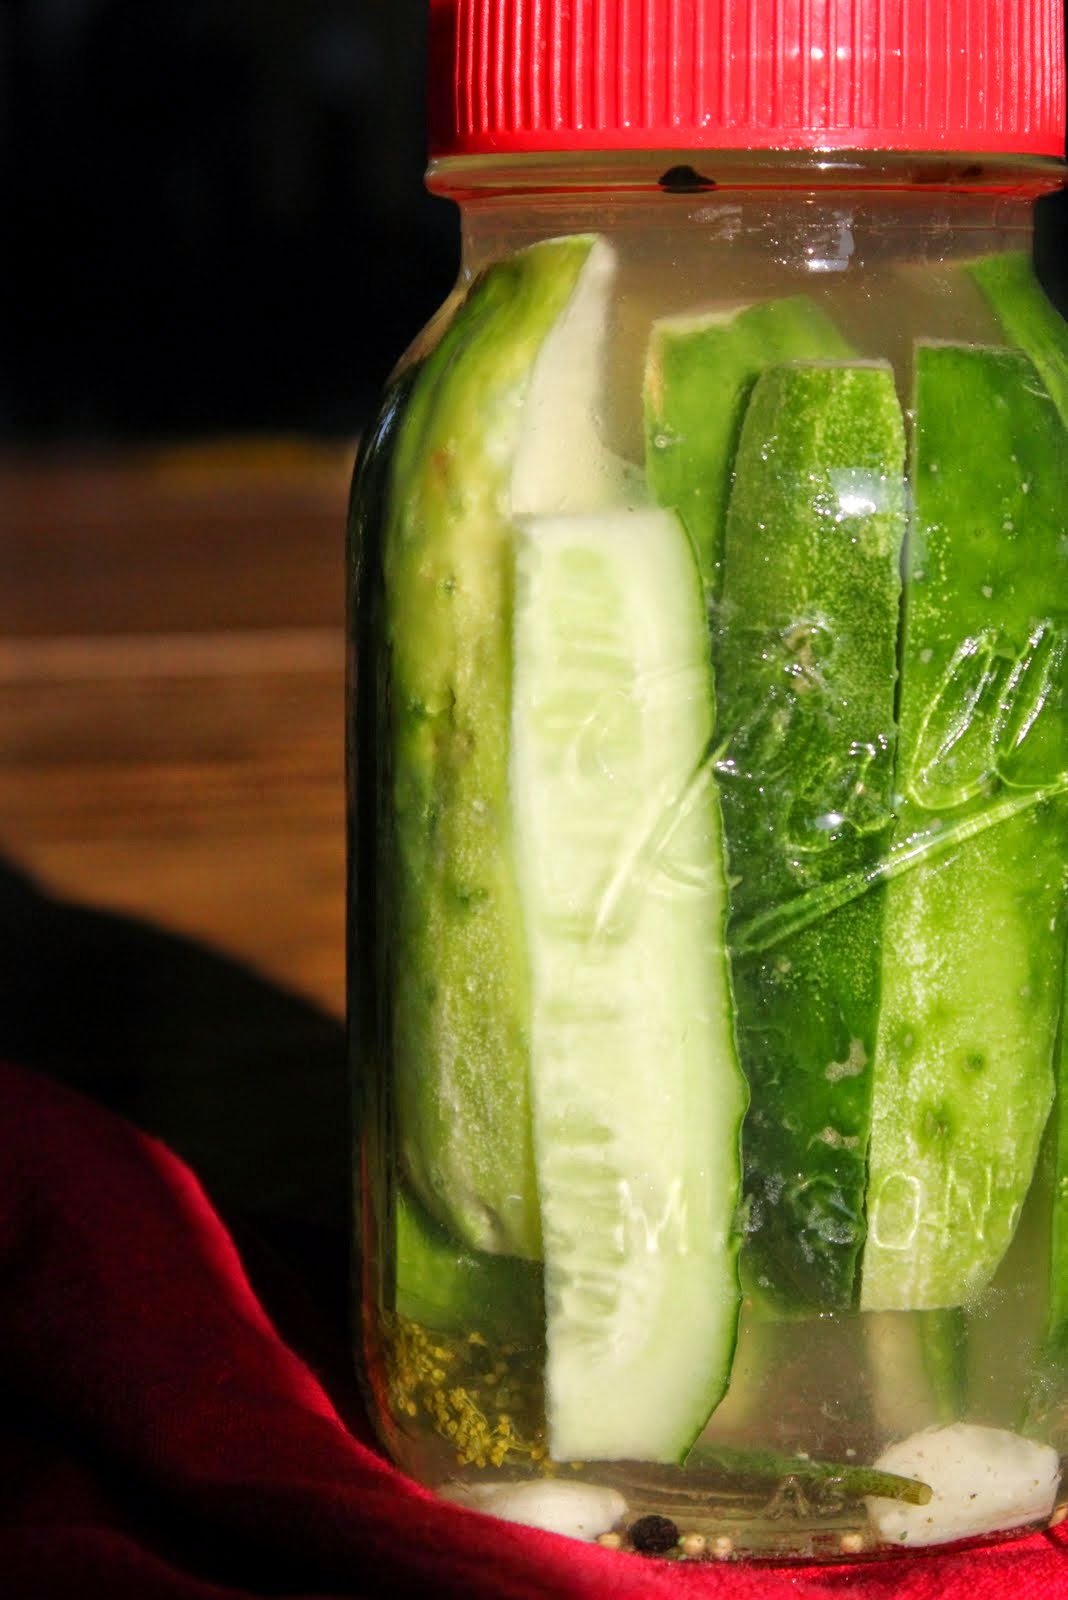
Last summer, I only canned pickles when we had more than we could gobble fresh.  We prefer these fresh pickles to the canned ones, though it was still nice to store some to get us through the winter.  Cold and oh-so-crunchy fresh from the refrigerator, they're hard to beat.  They keep for weeks, but they never last that long around here.  They can be sliced in coins, too, if you're hankering for crunchy pickles on your burgers.

Crunchy Refrigerator Pickles

Prepare your favorite pickle brine (ours is below)

Kosher Dill Pickle Brine

For one quart jar:

2 or 3 garlic cloves, split 
1/8 cup (2 tbsp.) pickling salt 
1 and 1/2 cups white vinegar
1 and 1/2 cups water
1- 2 heads fresh dill (depending on the size of the head!)
4 black peppercorns 
1/4 tsp. mustard seed

Add sliced cucumbers, dill, peppercorns, and mustard seed to jar.  Bring remaining brine ingredients to a boil and stir to dissolve salt.  Pour over cucumbers into the quart jar, covering them.  Once brine cools, place in refrigerator for at least 8 hours for best flavor.  Reserve extra liquid, if there is any, to add to jar when brine weakens.  Add more cucumbers as needed through the weeks and strengthen or replace brine when necessary.  

*We've not tried this yet, but an alternate method is to salt the cukes first to draw out water for 30 minutes or so before rinsing them and proceeding as normal. This would prolong the strength of the brine.

Monday, March 24, 2014

The Easiest Cheese Ever, Or, Farmer's Cheese (Or Paneer)


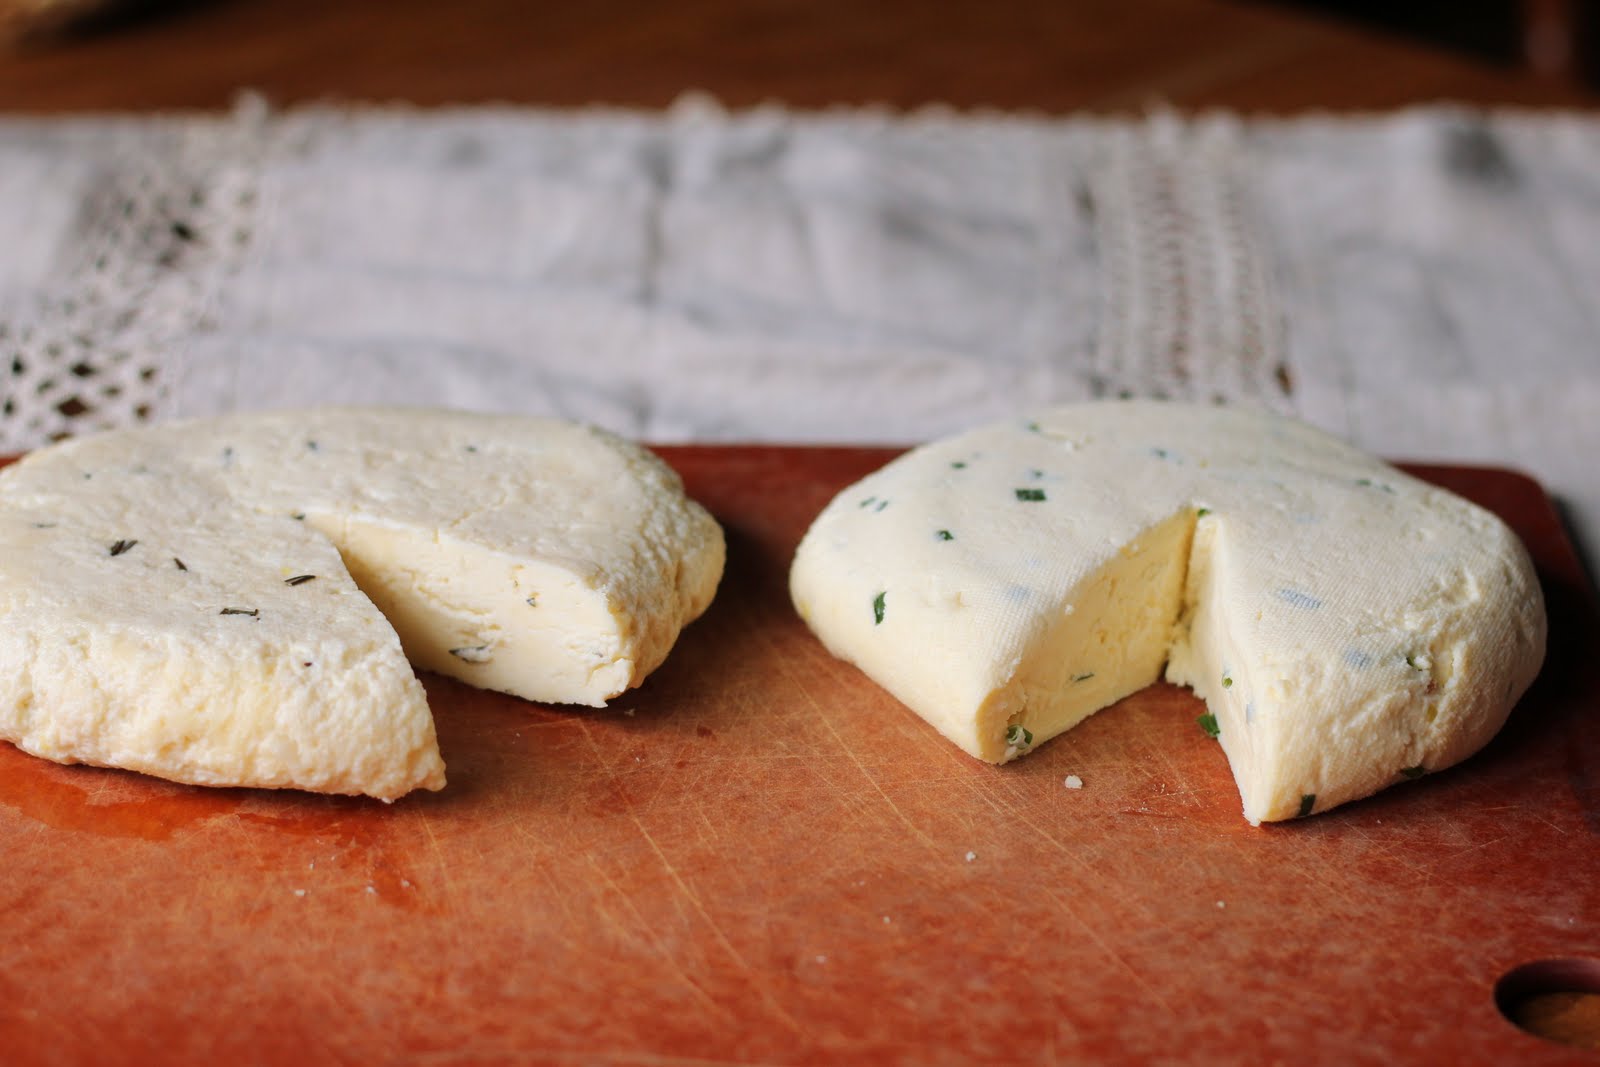
Seasoned or plain, this cheese is hard to beat for ease of preparation and delicious flavor.


I don't exaggerate when I say this cheese takes under ten minutes to make. Then you just let the whey drain, and you're set!  Because it takes too much dinero to buy raw milk, we just buy regular store milk.  As long as it's not ultra-pasteurized, it turns out fine.

$2.05 for one gallon of regular, pasteurized milk + ten minutes = one pound of cheese and a giant bowl of whey to use for baking, to add to shakes, soups, or sauces, or for feeding your chickens.
Not too shabby, huh?

Here's what you need:

-one gallon whole milk
-1/2 cup white vinegar (to make traditional paneer for Indian cuisine, substitute lemon juice for the vinegar)
-salt and/or seasonings
-a large, heavy-bottomed pot
-a colander
-a double layer of cheesecloth

Not necessary but fun to have
-a cheese press, the Real Deal or a makeshift one (to see my makeshift press, see below)
-helper elves to squeeze out whey faster (ditto)

Pour milk into pot and bring milk to a gentle boil over medium heat, stirring frequently.  Turn off heat and add the vinegar (or lemon juice) to pot while stirring constantly.  Within a short time, you should see the curds begin to solidify near the top of the pot, leaving the greenish-yellowish whey behind.  Once they've all separated, remove pot from the burner and carefully pour into a colander lined with your double layer of cheesecloth and resting over a large bowl to catch the whey.   At this point, you can add salt or seasonings, as desired-- for farmer's cheese, we add one tablespoon salt--, mixing them gently into the hot curds.  Note!  If you don't want your large bowl of whey to become flavored with seasonings or salt, then transfer the cheesecloth to another bowl before adding seasonings and squeezing out the rest of the whey.

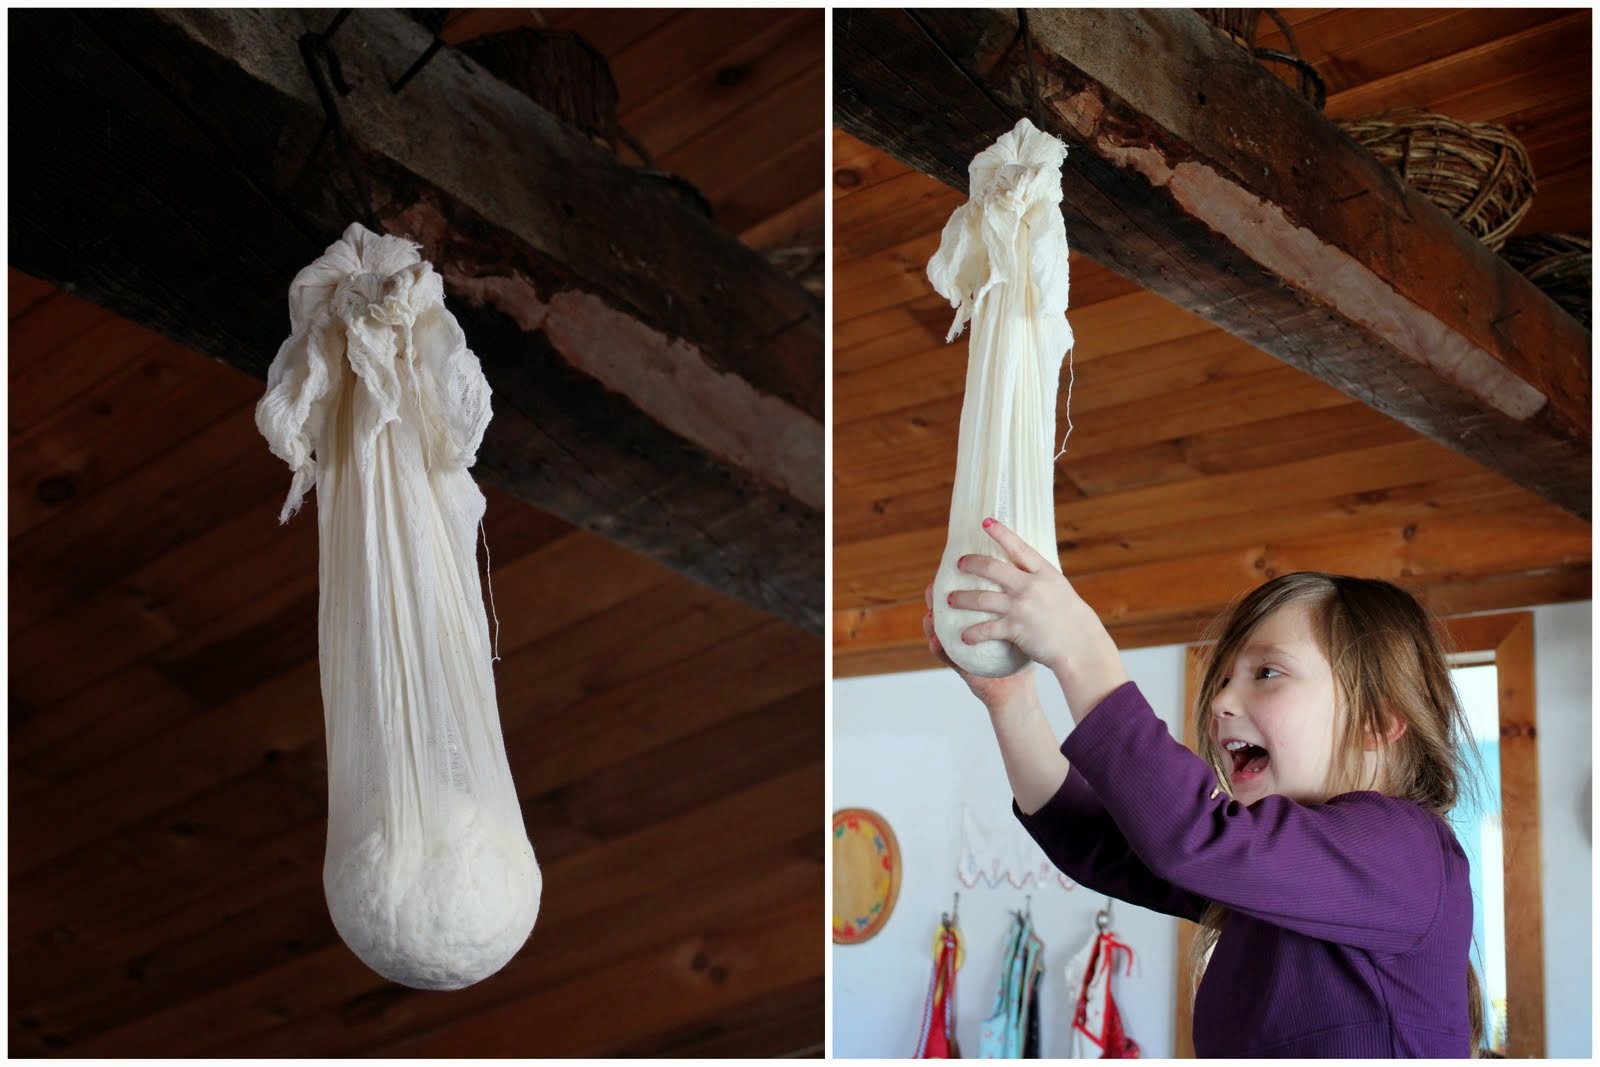
Once your seasonings are mixed in, lift the cheesecloth and twist it around the ball of cheese, squeezing to remove excess whey.  Then tie it on something high (a kitchen beam, a wooden spoon you slide into your upper cupboard's handles, the sink faucet, etc.) to drain out additional whey for about five minutes.  If you stop here, you'll end with a delicious, mild, crumbly cheese for salads, munching, curries, etc.


For a firmer, slicing cheese, squeeze out the whey as shown and then take the cheesecloth filled with still hot curds and place in a cheese press.  Don't have a cheese press?  No problem.  Just place it on a plate with the excess cheesecloth on the side to ensure a smooth top to your cheese.  Place a second plate on top of the cheese and weigh down the top plate with enough Heavy Stuff to press out the last of the whey and compress the cheese curds into a solid disc.  Refrigerate until firm and then gobble whenever you feel the urge.

Notes: If you make paneer using the lemon juice, you can gently rinse the curds with water after you drain them into the colander in order to remove some of the lemon flavor, if you want to take the extra step.

My current cheese press was given to me by Mrs. Terry and is showcased below.  A large coffee can with nail holes punched along the bottom edge works well.  Place the cheese inside, top it with a small saucer, and weigh down the saucer with Heavy Stuff.  Voila!  Slicing cheese!


Thursday, July 25, 2013

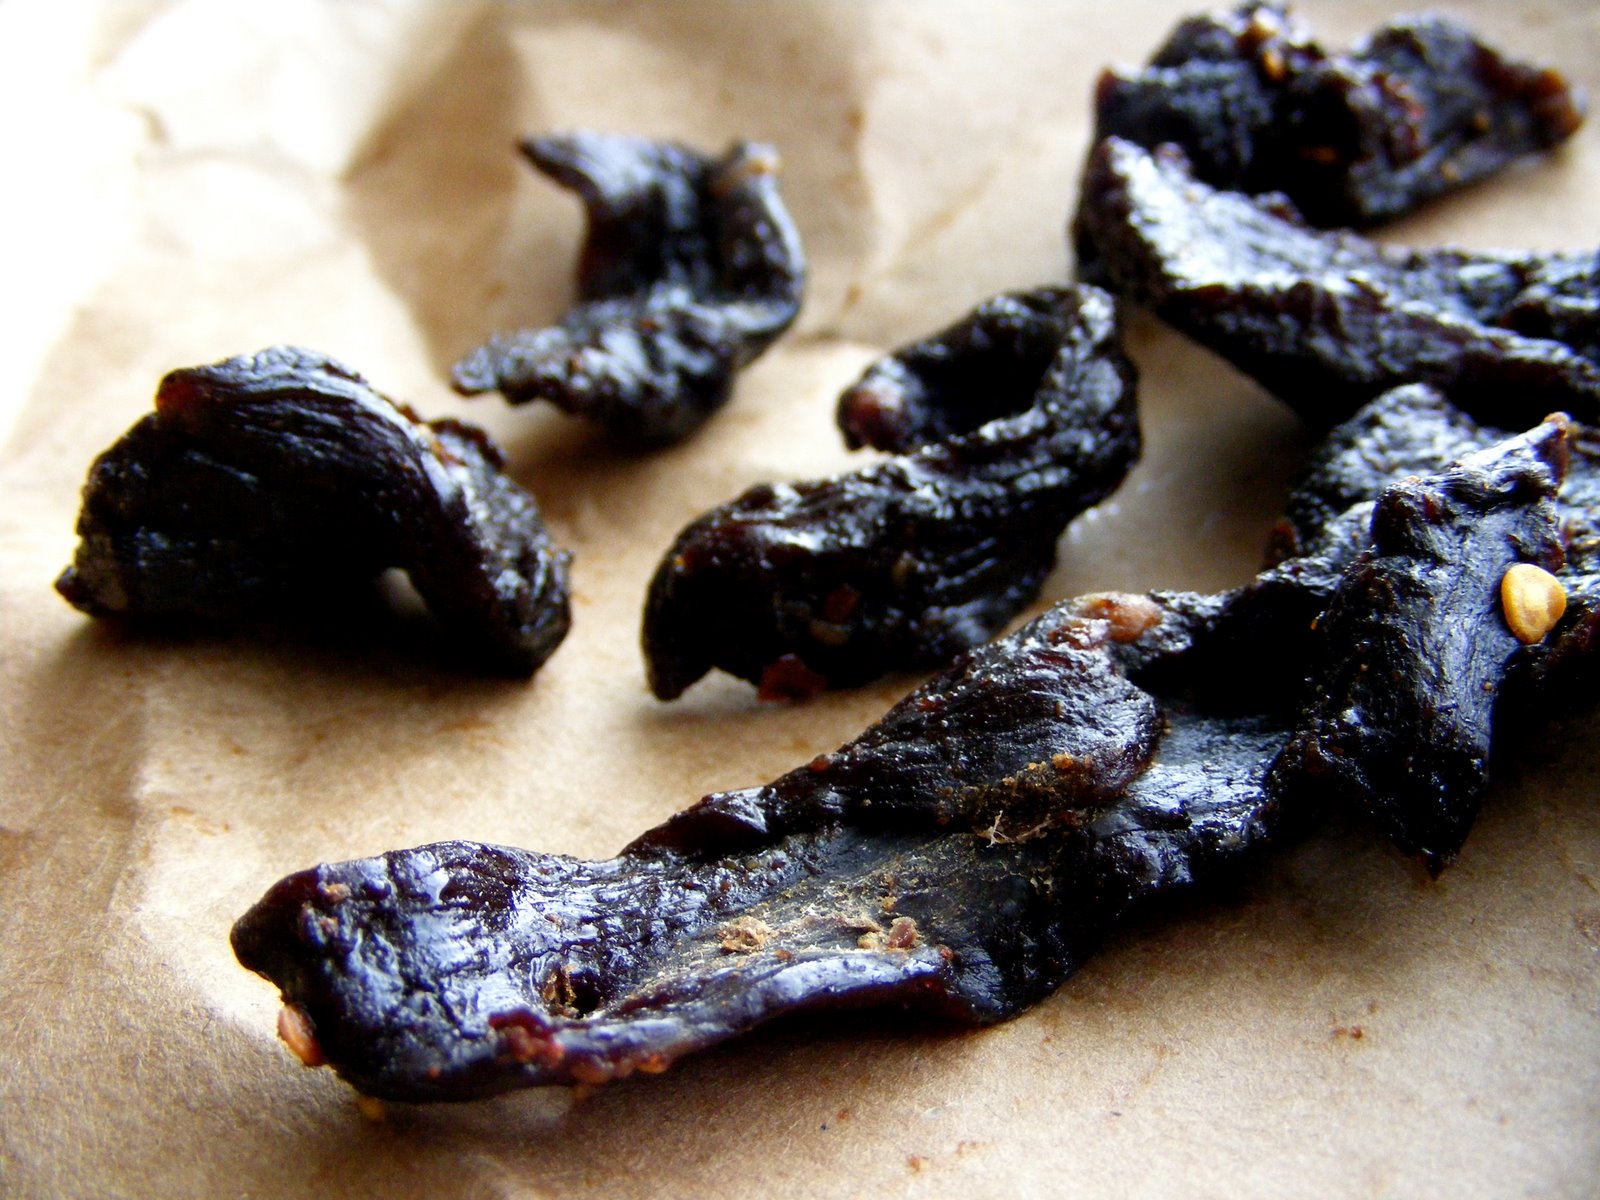
Blast from the Past: Venison or Beef Jerky

This recipe of sorts is what I created way back in Depew, when we only had TWO children.  Lands alive, I had no idea what wonders the next 8 years would bring...


Beef or venison jerky is so easy to make, and a thousand times cheaper than the Jack Link jerky you buy in those tiny bags at the Dandy Mart gas station.  (Wait, you don't buy those?  Never mind.)  I've never owned a dehydrator, so don't think you need one, although it will make the process even easier.

For those without a dehydrator (fellow sad saps), here's what you do:

Take a couple of pounds of venison or beef, freeze it until slightly but not fully frozen, about an hour, and then slice it as thinly as you can with the grain.

Take those slices of raw meat and marinate them in the fridge for a couple of days in the following concoction:

-1/2 cup soy sauce
-1/3 cup Worcestershire sauce
-4 tbsp. brown sugar
-1 and 1/2 tsp. onion powder
-1 and 1/2 tsp. garlic powder
-1/2 tsp. cayenne pepper
-1/4 tsp. black pepper
-2 tsp. salt
-crushed red pepper flakes, as many or as few as you'd like
-a glug of hot sauce, if desired
-a glug of liquid smoke

Preheat your oven to 150 to 200 degrees, hang the beef slices from the oven racks using toothpick skewers or place them in a single layer on cooling racks placed on top of cookie sheets.  Dehydrate all day long, about 4- 8 hours, checking and turning occasionally, until the meat has reached your desired jerky consistency.

Store in an airtight container and try not to eat all of it the first night ('cause that kind of stinks the next day when you want some jerky).

Friday, March 08, 2013

The Most Heavenly Vegetarian Sandwich for Meat Lovers: A Non-recipe

Two summers ago, John ate lunch with a work fellow, and he had a memorable vegetarian sandwich. Since he saved a few bites for me (lovely man), I also had a memorable vegetarian sandwich. Now, let it be known that I love meat even though we don't eat it regularly, but this sandwich was tops. Tops! That same summer, I attempted to recreate it with vegetables from our garden, and, not to toot my own horn, I made a pretty mean sandwich. By "pretty mean," I mean "pretty darn near perfect."

(Toot.)


To begin, here's an ingredient list:
Oh, wait.  It was TWO SUMMERS AGO.  I don't remember the exact amounts, so you're on your own here.  Do you like how I absolve myself of any liability if your sandwich doesn't turn out pretty darn near perfect?

-two red peppers, roasted, with seeds, ribs, and skin removed, then cut into strips
-one average-sized eggplant, sliced into 1/4- 1/3-inch slices (next time I'll also peel the thing)
-one enormous onion, sliced into thin rings (I used yellow, but I wish I'd grown a gourmet red)
-fresh garlic, many cloves, minced
-fresh basil, cut chiffonade
-balsamic vinegar
-salt
-pepper
-a bit of sugar
-extra virgin olive oil
-free WILD MUSHROOMS! (...or any kind of mushroom, or mushrooms you have to pay for, or omit the mushrooms entirely. You decide.)
-crusty, dense bread given to you by your mother (It could be either purchased or baked bread, I suppose, but I can't guarantee the results if it's not bread given to you by your mother.)


First, roast your peppers. Google instructions if you've not done it before. I'm too slothful to show you anything but the final product.


Toss eggplant slices in a bowl with balsamic vinegar, basil, minced garlic,


Stir in the roasted red peppers.


Go into the woods and search for wild mushrooms OR grab your free jar!  (Or buy one, but, again, I can't guarantee the results.)  Dump as many drained mushrooms as you like into the bowl and stir together to coat.  Season it all with salt, pepper, and sugar, to taste, and then spread in a single layer on a rimmed baking sheet.  Bake in a hot oven (400 degrees?) until eggplant is soft and the rest is hot and steaming.


While the eggplant is baking, take your sliced onion, throw it in a frying pan with a couple of teaspoons of extra virgin olive oil, and cook until onions are caramelized, adding salt and stirring as needed.

When onions are finished, toss with the eggplant mixture in a big bowl, lightly toast your crusty bread, and top with a hearty mountain of the eggplant mixture.


Top with a second slice of bread if you want, and then act like Dagwood.
Watch out.  It may be messy.


Thursday, March 07, 2013

Kale, Sweet Potato, and Caramelized Onion Pizza

Buildabelly doesn't accurate reflect my family's diet, but, hoo boy, I wish it did!  We'd eat lots o' meat (MEAT!), cheesecake, butter, butter, butter....more butter. Did I mention sugar? Sugar, sugar, sugar.  Sadly, our diets are more lackluster and barren. (What?  Our diet is cheaper and healthier?  Who cares!)  We do have pizza on most Friday nights, which, in summer, we top with all manner of garden vegetables, but in winter, it's cheese pizza every blessed week.  Once in a while I toss on roasted broccoli or caramelized peppers and onions, if we find a good sale, and there's the occasional white spinach pizza for good measure.  Yummy.  Boring.

 Enter kale and sweet potato pizza, a riff on this recipe.
Before you proceed, let it be known that while John and I loved it, the girls would have preferred yummy, boring cheese pizza, but what do they know?


Ingredients:

-Your favorite pizza dough recipe (I used 50/50 mixture of white and whole wheat flour)

Topping:
-2 sweet potatoes, sliced thinly (I use a mandoline slicer) tossed with 2-3 tsp. olive oil and a hearty sprinkling of sea salt.  Spread in a single layer on cookie sheet and oven-bake at about 400 degrees 'til centers are soft and edges are lightly golden crisp (in my oven, this only takes 10 minutes or so for thin slices)
-2 onions, sliced into thin rings and caramelized with  2-3 tsp. olive oil 'til sweet and golden brown.  Add salt and pepper, to taste.
-6-7 cloves fresh garlic, minced, and added to onions for last several minutes of cooking until soft
-several generous handfuls kale, torn and ribs removed, tossed with 1 tsp. olive oil, 1 tbsp. or so balsamic vinegar, and a hearty pinch of sea salt
-shredded mozzarella

Onto your unbaked pizza crust, spread the caramelized onions, spread the kale, layer the sliced sweet potato slices, and top with shredded mozzarella cheese before baking as you usually do.  (High heat oven, baking stone, cookie sheet...you pick!)


I had intended to add some ground rosemary to this, also, but I plumb forgot.  Next time I will, because (sorry, girls) I will be making this again!


Tuesday, August 16, 2011

Oven-baked Zucchini Fries (Are Not Really Fries)


I don't care how many people call them such, zucchini fries are not fries. They are, however, very tasty zucchini sticks. Actually, they're not sticks, either.

Solid straws?
Skinny planks?
Thin logs?
Thickly julienned portions?

I've never deep-fried these before, but given my admiration of fried foods, I can't imagine it would hurt. Does frying ever hurt anything?

Anyway, here is your recipe* for oven-baked zucchini, skinny-sliced-planky-strawed-fries. NO! NOT fries. Whatever. Just eat them! (They are really, truly delicious.) They are, in fact, quite similar to my non-recipe for breaded zucchini slices, only better.
*Here's a confession. I can't find the scrap of paper I jotted the ingredient amounts on as I tossed them in, so the ingredients aren't accurate, but I think they're pretty close. If I find the paper, I'll edit this, but, for now, just use your judgment. It's not rocket science, after all.


If you want enough zucchini for your entire family to eat for lunch (paired with nothing else but dipping sauce), as well as a few handfuls for your mother and sister, as well as a plateful to stick in the fridge, then take

2 medium-large (okay, leaning on the "large" but not yet "baseball bat") zucchini and cut them into "fries."

They can be as thick or thin as you like. I cut more thick than thin because I was in a hurry, but thinner sticks will be crunchier in the end. In a large bowl, mix about 1 cup all-purpose flour with some salt and pepper.

In a medium bowl, mix about 4 eggs and a few tablespoons of milk.

In a large bowl dump
about 4 cups of bread crumbs (I make my own from stale Italian bread, which of course makes plain bread crumbs. If you use seasoned crumbs, decrease spices to suit your tastes.)
about 1/2 cup parmesan cheese
1 and 1/2 tsp. garlic powder
1 tsp. onion powder
1 tsp. salt
1/2 tsp. black pepper
a dash of ground cayenne
a bit of ground paprika
any additional spices you desire
(ground rosemary, Italian seasoning, basil, thyme, etc.).

Preheat the oven to 400 degrees and drizzle a rimmed baking sheet (or two or three) with extra virgin olive oil.

First, dump the zucchini sticks into the bowl with the flour mixture and stir until the sticks are coated. Second, dip the zucchini sticks into the egg mixture. Third, dredge the sticks in the bread crumb mixture until well-coated. Fourth, place them in a single layer on your oiled baking sheet and bake at 400 degrees until browned on the bottom. Flip them and cook for a few additional minutes until browned on all sides and crisp-tender. The total time will depend on how thinly or thickly you slice the zucchini.

While making these, I thought that they'd probably also be yummy flavored with lemon pepper and dill weed paired with a garlic-y tzatziki sauce for dipping. Yum. And then I thought I could dip them in a butter/honey mustard mixture before dredging them in bread crumbs and serving them with more honey mustard, of course. Double yum. I guess I think too much about food when I'm cooking food.

Oh, yes. I made a quick red sauce for dipping by pureeing one quart jar of home-canned tomatoes with one small can tomato paste, salt and sugar in nearly equal amounts to taste, and then rosemary, basil, oregano, parsley, and thyme, to taste.

Enjoy!

And because food pictures just wouldn't be the same without the Hand of Mystery, here's Luci.


Cheesy Zucchini Fritters

Of course, they're healthy. Why do you ask?

These are extremely flavorful, and they use quite a lot of zucchini, which is good news to all of you gardeners around this time of year. Quit leaving zucchini on people's doorsteps and in unlocked cars, already! You should make piles of these greasy fritters, instead.


I gleefully ate four or more of these for lunch and then felt sick for the next hour. They were that good. I'd like to try zucchini fritters that are like potato latkes, except made with zucchini and extra spices, but my first attempt was a bit more...indulgent. The cheeses turn the fritters into royalty, and spices can easily be adjusted to suit your tastes. I recommend serving a pile of fresh vegetables alongside these for lunch. I did not do this, but I bet if I'd tempered the fritters with something less decadent, I would've been fine with my gluttony.

(And once again, I showcase my stellar photography skillz with a cloth napkin and a zucchini blossom. Someday I'll be original, but that day is not yet here.)


2 medium-large zucchini, about ten cups grated
1 large onion, minced
1/4 - 1/2 tsp. dried thyme leaves or about 1 - 1 and 1/2 tsp. fresh chopped thyme
1 tsp. salt
1/3 tsp. black pepper
1 and 1/2 tsp. garlic powder
1 cup all-purpose flour
1/2 cup finely ground cornmeal
2 eggs
3/4 cup parmesan cheese
3/4 cup mozzarella cheese

Grate the zucchini with a medium hand grater (or whatever you want to use) into a large bowl until you have about ten cups worth and then squeeze out as much excess fluid as you can. Stir in the cheeses and eggs. In a small bowl, mix dry ingredients together and then stir into the zucchini mixture.

Heat a few tablespoons of canola oil in a heavy-bottomed pan over medium-high heat (until flour sizzles) and drop batter into pan in amounts small enough to make fritters about the circumference of an orange. Fry until the bottom side is golden brown, flip, and cook the remaining side until golden brown and cooked through.

The only downside to these cheesy fritters is that it might take a fritter or two to get the knack of flipping them without them falling to pieces. Once the mozzarella cheese melts, the stability of the fritter is shaky until it's cooked enough to gain a bit of firmness, and I found smaller fritters easier to flip than the big ones. I like the zucchini ratio to be equal to or greater than the pancake amount, but if you're really struggling, just add some more flour, cornmeal, and spices, to suit.

Thursday, August 11, 2011

Crispy Kale, Or, Oven-Roasted Kale


I've talked about this before, hence this short zip-a-dee post. The girls gobble bowls of crispy kale like they're bowls of potato chips, and, truth be told, their mother does, too, though she wouldn't dare admit it in the public forum of a blog. (So shhhhh.)

Steps 1-5:

1. Step outside, walk to your garden, and pick some kale.
2. If it's large, tear the leaves from the stem; if small and tender, leave them whole
3. Toss kale in a large bowl with several drizzles of extra virgin olive oil and many shakes of salt
4. Broil in your oven for several minutes, stirring midway, until slightly browned and crispy.
5. Watch your children eat it all in one minute flat.

And just because I've also talked about this before, here's Luci's hand.


And Luci herself.


*A few tips:
1. Kale does not take long to scorch and burn. It can take seconds, really, so keep a close eye on it.
2. Kale shrinks considerably in the oven, so what you may think is a giant's portion is truly only a 3 year-old's portion.
3. Crispy kale does not taste like potato chips, but it doesn't have to in order to be yummy.

Tuesday, June 21, 2011

You Bet! (Potato Chips.)

I'm on a short break from weeding the flowerbeds, long neglected and pitiful. The only places clear of weeds are those spots where the hens have raked dirt into soft hollows perfect for dust bathing.

So, up to my neck in weeds, I felt the urgent need to put up a post about potato chips. That's me. Saving the world one outdated recipe at a time.

Since I can't justify spending more than a few minutes in Procrastinator's Paradise, here's a no-brainer "recipe" for potato chips.


These are so easy to make and much better than plain chips from a bag. I have yet to experiment to make Salt & Vinegar chips, but if I succeed, I'll feel like a culinary goddess.

First, find some potatoes.
Scrub them, but don't scrub off the skins.

Second, slice the potatoes as thinly as you can. I've done it in the past with a sharp knife and my very own butterfingers, but this time, I realized how dumb I was for forgetting I own something that looks similar to this. John bought a clearance slicer for me many years ago, and I don't use it as often as I should. It slices the potatoes in uniform, extremely thin slices. Consumers, go buy one today!

Okay, step number three. Fill a heavy-bottomed pot (or a fryer) with several inches of canola oil* and heat until a pinch of flour sizzles when you drop it in. If the flour doesn't sizzle, the slices will soak up oil and be soggy, so wait for the sizzle! (*It doesn't have to be canola oil, but canola oil has a high burn point and it's high in monounsaturated fats, so win-win.)

Step four. Fry potato slices in sizzling, sizzly oil until golden brown. Drain on paper towels or a wire rack, or on paper towels on a wire rack.

Step five. SALT HEAVILY. QUICKLY!!! I love salt, though, so use your judgment here.

Step six, the most important and complex of all of these complex instructions...

Eat them all before your husband comes home.
Or save five or six for him, like I did.

Insert bland snapshot here.


Tuesday, January 27, 2009

Millie's Crunchy, Fruity Granola

Brought to you by the monkey spoons...


and by this awesome cookbook.

Our Owen family gave the girls some cool cooking utensils for Christmas, and Millie put them to use our first week back. She and John made granola together, and it's so unhealthy that it practically melts in your mouth after you crunch it (that makes no sense, but it's true). The granola recipes I've made before are very dense, "granola-y," and, yes, healthier than this one, which has a phenomenal crunch and a really light taste. "Light" because the recipe calls for 3/4 cup of canola oil!!!! You heard it here first. Lotsa oil results in a light granola recipe.

I'm no diet guru, so you know what I mean, right? The texture is very crunchy and yet remains light and crisp because of the large amount of oil. There, now that that's settled, let's move on to the recipe.


3 cups rolled oats (old-fashioned oats)
2 cups combined seeds and chopped nuts (we had no nuts in the house, but sliced, toasted almonds would have been perfect)
1/2 tsp. salt
1/3 cup brown sugar
3/4 cup canola oil
1/2 cup honey
1 tablespoon vanilla extract
1 cup assorted dried fruit of small varieties, such as raisins, currants, cranberries, or blueberries (We used dried cranberries, which we purchased especially for the occasion)

1.Preheat oven to 325 degrees. Grease a 13x 18 baking tray (or rimmed baking trays of any size, as long as the granola mixture is spread in a single layer).

2. Combine the oats, seeds and chopped nuts, salt, and brown sugar in a large bowl.

3. Combine the oil, honey, and vanilla extract and pour into the dry ingredients. Mix thoroughly and spread on the prepared tray.

4. Bake for 30 minutes, or until golden. (Stir once or twice during baking.)

5. Cool on the tray. When it has cooled down and become crunchy, add the dried fruit.

6. Eat plain or with milk. (Or on top of plain yogurt...or for dessert.)

Note: We added white chocolate chips to a small amount for this picture, then I took them out because it's better with just the fruit (and almonds, if you have them). They look festive in there, though.


Thursday, October 30, 2008

Cherry Tomato Salad with Feta and Red Wine Vinaigrette


Looking at these pictures makes me miss summer's bounty. Ah, well. This is a fresh tomato salad with a light vinaigrette. And, for heaven's sake, be generous with the feta. When you're treating yourself to feta, you may as well go all out.


Go to the garden (sob!) and pick a generous amount of sweet sungold and cherry tomatoes and some oregano. Slice the tomatoes in half and toss them in the desired amount of the following dressing. Let sit for a bit, top with crumbled feta, and eat. I haven't tried it with dried herbs, but if you do, remember that every tablespoon of a fresh herb is roughly equal to one tsp. of the dried herb.

Red Wine Vinaigrette

1/2 cup oil (I think I used a mixture of canola and olive oil)
1/4 cup red wine vinegar
1/2 cup finely chopped red onion
finely chopped fresh oregano, to taste, about 1 tsp. (next summer, I'm trying it with basil)
1/4 tsp. sea salt
freshly ground pepper, to taste
pinch of sugar, to taste (about 1/2 tsp.)

Combine all ingredients and let sit for a few hours.

Killer Dill Dip

At least I think so. (And it's perfectly safe to eat, you literalists.)

I made this for Millie's birthday party. Maybe I think it's excellent because I'm a sucker for dill dip, or maybe it's because the crispy, chewy bread Titi brought and with which I pared the dip was tippety-top, or maybe, just maybe, this is a killer dill dip. I dunno which is the truth, but I loved it even so.


4 oz. mayonnaise
4 oz. salad dressing (Miracle Whip kind)
8 oz. sour cream
several tablespoons finely chopped onion
at least 2 tbsp. chopped fresh dill
3/4 tsp. sea salt
about 1/4 tsp. garlic powder
about 1/8 tsp. lemon pepper
celery seed, crushed in a coffee grinder, to taste (or, if you're smart and have celery salt in the house, just use that!)

Mix all together until smooth. Cover and chill for several hours or overnight to let flavors meld. Serve with veggies, crackers, etc.

Tomato Spinach Spread

Yes, this is a funny picture. The dip looked so pale and blase that I grabbed a red pepper from the windowsill to add some color to the picture. Just pretend the spread is wearing a giant, red hat.


This is a good vegetable spread and is delicious on well-baked, crusty bread, pita, or veggies. I won't rave over it like I did the dill dip because I prefer the dill dip. Just think of this as the dill dip's shy, little sister sitting in the corner wearing a bright, red hat. Cute, but for those who love ol' Dill, just not as eye-catching.

4 oz. cream cheese, softened
4 oz. sour cream
1/3 cup milk
1/2 tsp. sea salt
1/4 tsp. cayenne, plus more to taste
dash cumin
dash garlic powder, to taste
a generous tsp. lemon-pepper seasoning
3 giant roma tomatoes, or 2 regular tomatoes, chopped (let juice drain off before adding to the spread)
1 package (10 oz.) frozen, chopped spinach, thawed and squeezed dry.
1 small onion, finely chopped

Beat cream cheese, sour cream, milk, and seasonings until smooth. Stir in tomatoes, spinach, and chopped onion. Chill for a few hours to let flavors meld.

Wednesday, May 14, 2008

Sugar Delight


As dictated to me by Chef Millie, here's the recipe for her stunning Sugar Delight. (The top picture is after melting in the microwave, but before stirring; the bottom picture is before melting and stirring).

Use your own culinary sense in determining amounts and adding order. If I may offer one suggestion, go easy on the sugar and heavy on the delight.

brown sugar (I saw how much she added. It was about 1/2 cup!)
cinnamon sugar
crisp rice cereal
peanut butter
honey
raisins
semisweet chocolate chips
marshmallows
a "tad" of salt
a tad of water
milk

You stir it and heat it in the microwave until melty. Then stir it again after heating it in the microwave. Whoever makes this could make their own-- 'specially the children-- their own recipe.

For 3+. [Ages three and up. I assume she means the preparers can be three and up, as two year-olds can easily eat this...not that they should).

Grilled Portobello Mushrooms with Tomatoes and Fresh Mozzerella


When John came home with portobello mushrooms (which I've never bought before) along with exotic ancho chili powder, asparagus, fresh lemons, fresh basil, and mozzerella, I just about fainted. As much as I loved him for taking the task of supper-making almost entirely off my hands, I knew that we'd move to the poorhouse if this was going to be our typical fare. Well, the other recipes from that particular supper have since passed, but after he made this portobello recipe for the third (THIRD!) time, I gently suggested that we should put our tax refund into a locked savings account before we ate it up in portobello form.

If there's no choice but to eat one's tax refund, though, this surely is the best way to do it.

Even if you don't like mushrooms, make the tomato salad and eat it plain. The flavor is simple and fresh and tastes like a spoonful of summertime. Also, use your judgment with the olive oil application.

Recipe courtesy Giada De Laurentiis

3 tablespoons olive oil, plus extra for greasing grill pan
4 large portobello mushrooms (about 5 inches in diameter), stemmed
Salt and freshly ground black pepper
3 tablespoons extra-virgin olive oil, plus extra for drizzling
2 cloves garlic, minced
3 small to medium sized vine ripened tomatoes, cut into 1/2-inch pieces
8 ounces fresh water-packed mozzarella, drained, cut into 1/2-inch cubes
1/4 cup chopped fresh basil leaves
Prepare the barbecue (medium-high heat).
Drizzle 3 tablespoons of olive oil over both sides of the mushrooms. Sprinkle the mushrooms with salt and pepper. Drizzle olive oil on grill pan to prevent mushrooms from sticking. Grill until the mushrooms are heated through and tender, about 5 minutes per side.

Meanwhile, whisk the extra-virgin olive oil and garlic in a medium bowl to blend. Add the tomatoes, cheese, and basil and toss to coat. Season the tomato salad, to taste, with salt and pepper.

Place 1 hot grilled mushroom gill side up on each of 4 plates. Sprinkle with more salt and pepper. Spoon the tomato salad atop the mushrooms, drizzle with extra-virgin olive oil to finish, about 1 tablespoon and serve.

Cardamom Fruit Dip

Sorry. I have no picture of this easy, yummy dip. We used it on apple slices when we had company over, and it disappeared pretty fast. Next time, perhaps...

4 tbsp. cream cheese, softened
liberal dashes of ground cardamom, to taste (1/2 tsp.?)
lemon or vanilla extract, or both, to taste
granulated sugar, to taste
sour cream, about 8-12 oz.

Blend together the softened cream cheese and the sour cream. Stir in the sugar until incorporated, and then add flavorings, to taste. We've only used this on apple slices, but I think it would be equally good on grapes and bananas.

Tuesday, January 15, 2008

Garlic and Herb Cherry tomatoes


Sigh. Looking at these summertime pictures of summertime food is killing me. I can't wait to make this again this summer. The recipe comes to us from the Barefoot Contessa. I don't really know who she is, but John has a television in the room at work, and though they can't see much on it, it has audio. Being the tomato lover he is, he printed this recipe out and brought it home.

I loved these, but John decided he still likes cherry tomatoes best uncooked, straight from the garden, by the dozen, and unadulterated by anything but copious amount of shaken salt.

3 tbsp. good olive oil
2 cloves freshly minced garlic
2 pints cheery tomatoes (I just grabbed an apronful from the garden....sob!)
2 tbsp. chopped fresh basil
2 tbsp. chipped fresh parsley (I think I added less, with a bit more basil instead)
2 tespoons chopped fresh thyme (I didn't grow thyme, so I omitted this)
1 tsp. sea salt
1/2 tsp. freshly ground black pepper

Heat the olive oil in a saute pan large enough to hold all the tomatoes in one layer. Add the garlic to the oil and cook over medium heat for 30 seconds. Add the tomatoes, basil, parsley, thyme, salt, and pepper. Reduce the heat to low and cook for 5 to 7 minutes, tossing occasionally, until the tomatoes begin to loose their firm round shape. Sprinkle with a little fresh chopped basil and parsley and serve hot or at room temperature.

YUM!