Showing posts with label Desserts. Show all posts

Thursday, July 09, 2015

Lemon Curd, I Love You


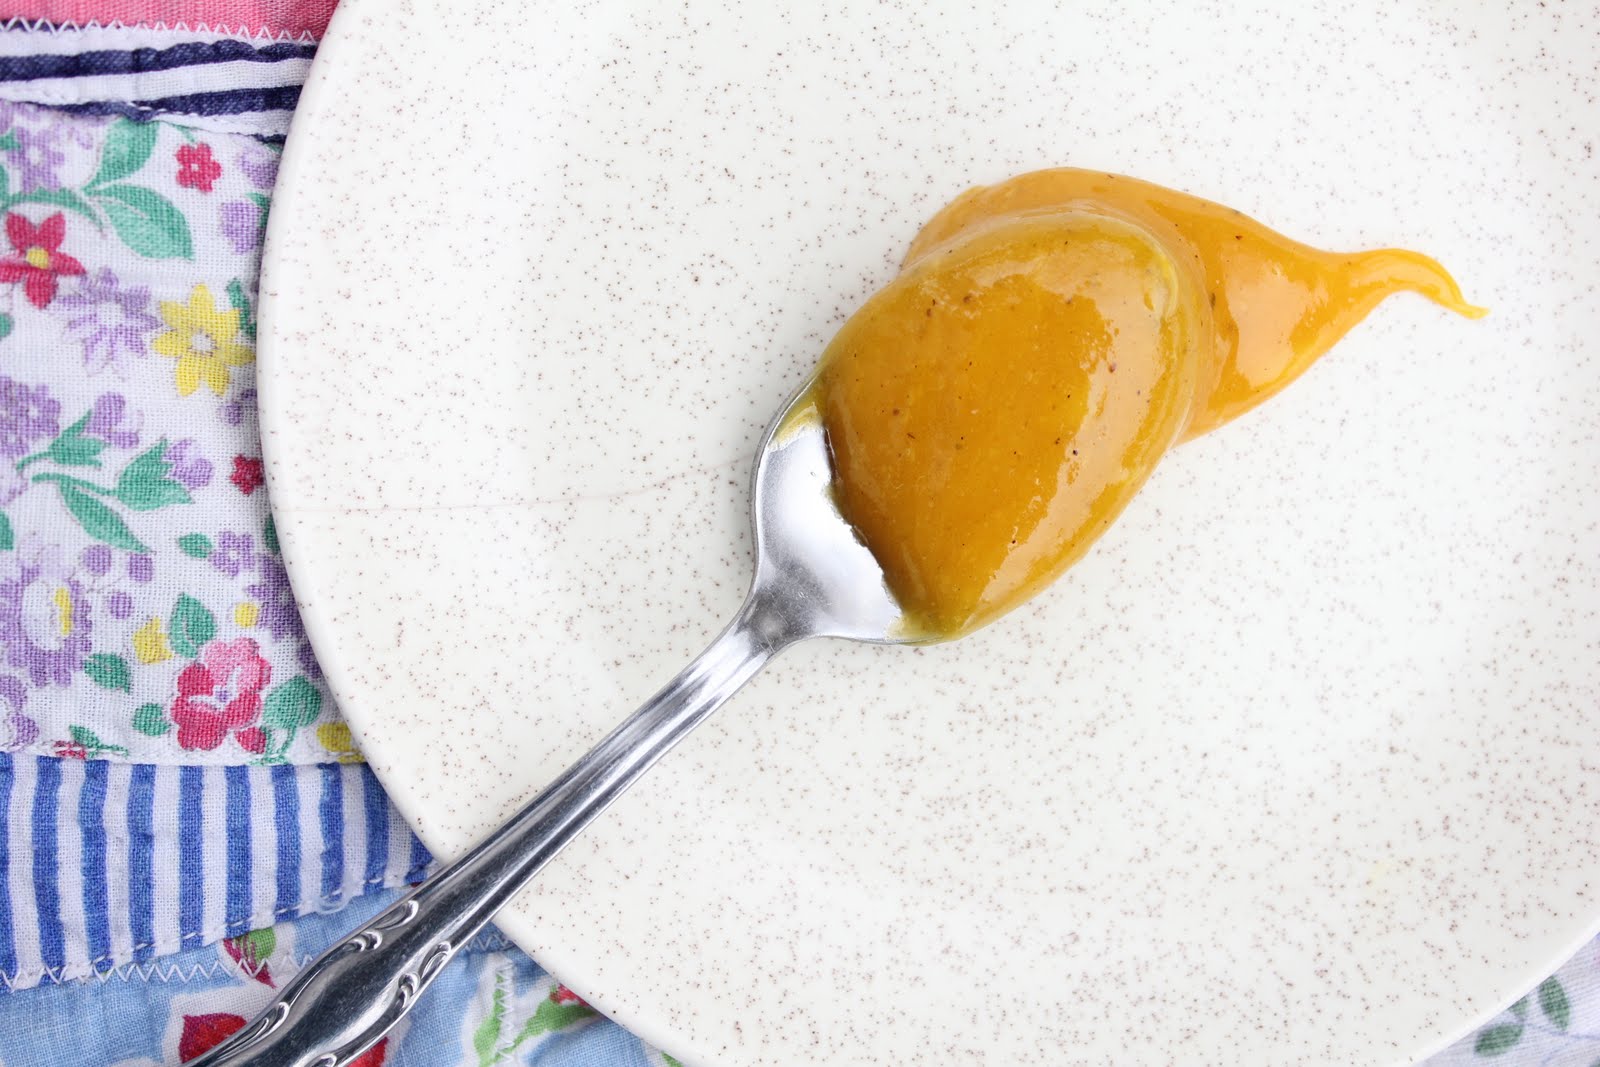
I can't believe I'd never eaten such a delicious thing as lemon curd before.  It is SO GOOD.  Any lovers of lemon will find it hard not to eat plain.  Rich, buttery, bursting with mouth-puckering, sour-sweet flavor, this is something I will certainly add to my holiday fare. Lemon curd can be layered between pudding or whipped cream as a dessert, used as a filling for layer cakes, or, traditionally, spread on toast in lieu of jam, though I've not tried that.

**   Those of you who are here to make the filling for the angel food cake should triple the amounts below.  This will use up all those egg yolks perfectly.  If you have any curd leftover, I found that a spoonful or two stirred into plain homemade yogurt turns it into a knockout dessert, as shown below. Plus, you know, there's always just that empty spoon waiting to be filled. **


Without further ado, a recipe for lemon curd, which I adapted from The Fannie Farmer Cookbook.

Lemon Curd

yield: about 2 cups

Grated zest of 3 large lemons
about 6-7 tbsp. of fresh lemon juice
1/4 lb. (1 stick) butter
1 cup sugar
4 egg yolks 

In a small bowl, stir the yolks until thoroughly blended, then heat the butter and sugar in a saucepan over medium-low heat until butter melts and sugar dissolves.  To the butter/sugar mixture, add the lemon juice and lemon zest.  Stirring constantly, pour the egg mixture into the lemon mixture, and still stirring constantly, continue to cook until the curd is thick.  This may take up to 15 minutes.  Don't increase the heat, as the butter and zest can scorch.  Remove from the heat (curd will thicken more as it cools), cover with plastic wrap against the surface to prevent a "skin" from forming, let cool, and store in the refrigerator.  Curd will keep up to 2 weeks, if you can bear to let it last that long.

* If you're worried about scorching, just use a makeshift double boiler.  Fill a large pan with one inch of water and rest a bowl on top of that, not touching the water, but just above it.  This way the water will heat the curd gently without fear of scorching it with direct heat.  I'm usually too anxious to finish to use this method, though.


Lemon Cheesecake with Raspberry Sauce


Lemon and raspberry were meant to live under one roof-- or in one dessert, as the case may be.  I made this as one of the Easter desserts over a year ago, and it was marvelous.  (Yes, I like lemony desserts for Easter, in case you noticed a theme here.)


Lemon Cheesecake with Raspberry Sauce


Crust:
3 cups crushed graham crackers
1 tsp. ground cinnamon 
1/3 cup butter, melted
 
Combine and mix well in a bowl, then press across the bottom and up the sides of a greased 9-inch springform pan.
Bake in a 350 degree oven for 5 minutes and then cool completely.

Filling:
4 8-ounce packages cream cheese, room temperature
1 cup sugar
2 tablespoons (1/4 stick) butter, melted

2 tbsp. flour
5 large eggs
2 teaspoons vanilla extract

1 tsp. lemon extract
about 6 tbsp. fresh lemon juice
2 tbsp. freshly grated lemon zest (for batter)
an additional 1-2 tbsp. freshly grated lemon zest set aside for garnish, if desired

Topping, if desired:
sour cream (an 8 oz. container is enough)
vanilla extract (start with 1/4 tsp.)
lemon extract (start with 1/4 tsp.)
granulated sugar 
1-2 tbsp. freshly grated lemon zest, previously set aside, for garnish


Beat cream cheese and sugar in a large bowl until smooth. Beat in butter and flour, and then add the eggs one at a time, beating until just combined. Mix in both extracts, the lemon juice, and the zest.  *Don't overbeat the mixture once you've added the eggs. This beats air into the cheesecake batter, which will cause the cheesecake to fall and crack while baking.

Pour cheesecake batter into graham cracker crust and bake in a 350 degree oven for about one hour or until the center is almost set. (Sides should be puffed and set, and center will move slightly when shaken.) Cool in a cracked-open oven for ten minutes. Carefully run a knife around the edge of the pan to loosen the crust. Cool for one more hour and then refrigerate overnight to let the flavors ripen.

For topping, mix together sour cream, vanilla and lemon extracts, and granulated sugar, to taste, until the sugar dissolves.  Set aside with the reserved lemon zest.
 
After cheesecake has completely cooled, spread with the sour cream mixture and sprinkle with lemon zest.  Spoon raspberry sauce over individual slices.

Raspberry Sauce
1 bag frozen raspberries or several cups fresh raspberries 
sugar, to taste
about one tablespoon corn starch dissolved in a small amount of cold water.

Puree the berries (if using frozen, you can just smush with spoon), place in small saucepan, and add the sugar and corn starch. Cook over medium heat, stirring frequently, until the sugar dissolves and the sauce thickens.

Note: If you want to be proper, the pureed or smushed berries should be strained to remove the seeds BEFORE you put them into the saucepan, but I've always just left them in. Cool and refrigerate.

(Mostly) Aunt Karen's Monkey Bread


The first time I made this, the sticky, cinnamon goodness overtook me, and I ended a feeding frenzy by ruefully remarking, "I should never have touched that monkey bread."  This prompted John to share a theological insight about Eve's original sin and her feminine wisdom in recognizing that touching leads to eating leads to regret, which was a morally acceptable result of my gluttony.  (Y'like how I just justified my gluttony?!)

Also overheard at the table the first time I made it were little girls saying,
"Oh, I'm so full, but I wish I wasn't."
"If only I wasn't too full for more."
etc.
etc.

I put this under both the labels "breakfast" AND "dessert."


If these anecdotes don't convince you that Monkey Bread is worth making, I don't know what will! Aunt Karen is to blame for this recipe.  She gave it to me several years ago, and we give her our sticky-fingered thanks.

Note:  To make it easier on  yourself, ignore my directions for homemade yeasted dough and just use 4 cans of store-bought refrigerated biscuits (simply quarter each biscuit with scissors before rolling in the coating).  That's what her recipe calls for, but we never have them in the house, and we always have yeast and flour, so there you have it.


Mostly Aunt Karen's Monkey Bread

For the sweet bread (source-- Mel's Kitchen Cafe):
-  a couple tbsp. of melted butter for greasing the pan
-  1 cup warm-to-the touch milk
-  1/3 cup warm-to-the-touch water
-  1/4 cup granulated sugar
-  2 and 1/4 teaspoons yeast
-  3 and 1/4 cups all-purpose flour
-  2 teaspoons salt

For the sticky, cinnamon goodness (Aunt Karen all-the-way):
several tbsp. melted butter
3/4 cup granulated sugar
3 tbsp. ground cinnamon

plus an additional
1/2 cup butter, melted
3/4 cup brown sugar

For the glaze (Also Aunt Karen):
2 cups powdered sugar
1 tsp. vanilla
4 tbsp. milk


*If using refrigerated biscuits, skip straight to the cinnamon sugar part at #5 after greasing the pan.
  1. Grease a bundt pan with melted butter.  Make sure the entire surface (including in between those ridges) is well-greased. 
  2. Mix together the milk, water, melted butter, sugar, and yeast.  Mix the flour and salt together in a large bowl or mixer. Make a well in the center of the flour mixture, and add the liquid mixture slowly, breaking to stir and incorporate (if by hand) or by using dough hook attachment on mixer.  After the dough comes together, mix by machine or knead by hand on a floured surfaced until smooth. If you think the dough is too wet (i.e. having a hard time forming a cohesive mass), add 2 tablespoons flour at a time and mix until the dough comes together.  The dough should be sticky but not wet.  Coat a large bowl with nonstick cooking spray. Place the dough in the bowl and turn to coat lightly with the cooking spray. Cover the bowl and let rise in a warm 'til doubled. ( I usually let my dough rise in an oven that has been warmed to 150-200 degrees and then turned off. Just don't forget to turn off the oven! I warn from experience...)
  3. While the dough is rising, mix the 3/4 cup white sugar and 3 tbsp. cinnamon together in a bowl. Place a few tbsp. melted butter for dipping in a second bowl and set aside.
  4. Once dough has risen, place on a floured surface and and press it into a rough 8-inch square. Using a pizza cutter or a knife, cut the dough into 64 pieces.(Alternately, just pinch off pieces like I do.  It's messier, but it works).
  5. Roll each dough piece into a ball (it doesn't have to be perfect, just get it into a rough ball-shape). Working one at a time, dip the balls in melted butter, allowing excess butter to drip back into the bowl. Roll the dipped dough balls in the sugar/cinnamon mixture, then layer the balls in the Bundt pan, staggering the seams where the dough balls meet as you build layers. 
  6. Then, because there can never be too much when butter and sugar are involved, mix the 1/2 cup melted butter and 3/4 brown sugar.  Pour this mixture over the stacked dough balls.
  7. Cover the Bundt pan with greased plastic wrap and let the monkey bread rise until puffy and it has risen an inch or two from the top of the pan, about 1-2 hours. (Skip this part if you're using refrigerated biscuits and proceed to the baking part.)
  8. Heat the oven to 350 degrees F.  Unwrap the pan and bake until the top is deep brown and caramel begins to bubble around edges, 30 to 35 minutes. Cool the monkey bread in the pan for 5 minutes (any longer and the bread will be too sticky and hard to remove!), then invert on a platter or large plate and allow to cool slightly, about 10 minutes.  (Sometimes a few pieces fall off.  Don't fret; just pick them up and plop them back on once the whole thing is out of the pan and on the platter.)
  9. Whisk glaze ingredients together until smooth and pour over the warm monkey bread.  Serve to the adulation of anyone with a sweet tooth.
Notes:
*Aunt Karen also adds raisins and curshed nuts throughout while placing the dough pieces into the pan.  We haven't yet tried it like this, but it sounds delicious.

Carrot Cake Trifle-- a Non-Recipe


Take the best carrot cake recipe and halve it, baking it in a 13 X 9 pan, instead.

Fold whipped cream into vanilla pudding and spoon the cake pieces and pudding mixture in layers, topping the whole thing off with whipped cream and cake crumbs.

Mister Rabbit approves.

Monday, March 24, 2014

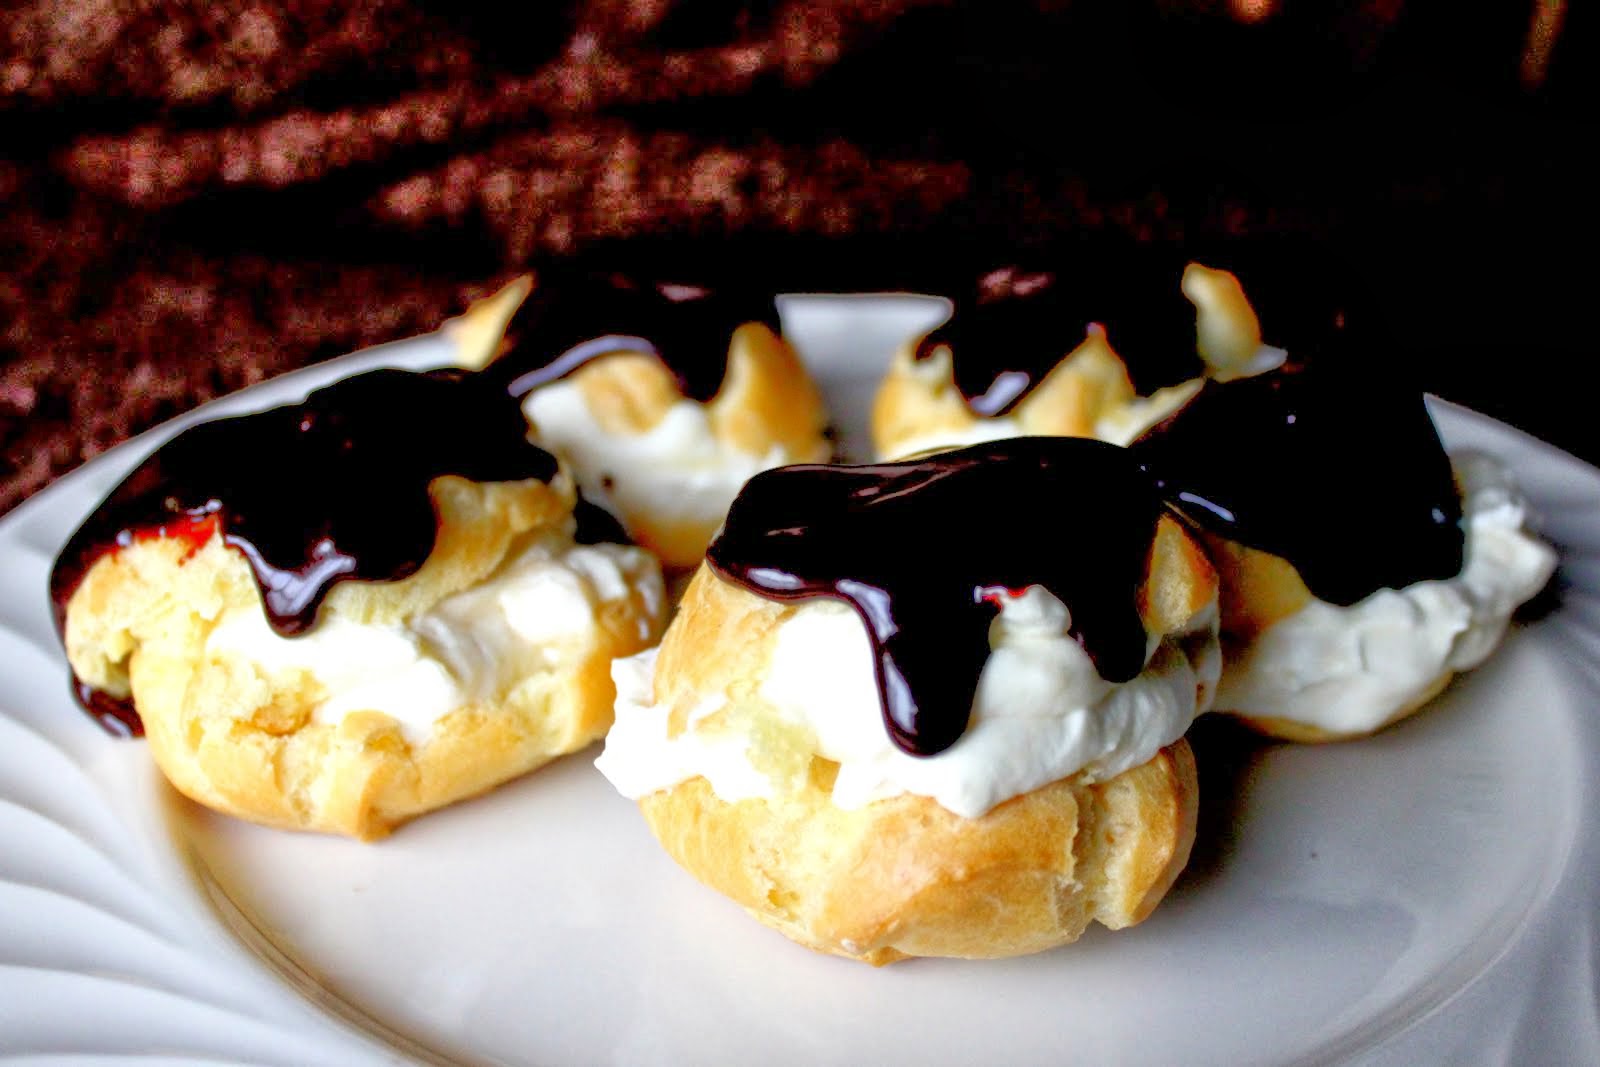
Cream Puffs

...because buildabelly needs them.  Because YOU need them.


 I haven't made cream puffs since I was fourteen years old.  After each break, when my parents drove my older sister back to college, I'd make something elaborate from the cookbook to sustain my older and younger siblings and myself while they were gone.  The offerings were predictable: divinity (always a sickly-sweet winner), molasses taffy, cookies and cakes of all kinds, and...cream puffs.  The funny thing is that I only made the puffs and not the cream.  We were so hungry by the time the puffs emerged golden-brown from the oven that we just filled the shells with Christmas m&ms from the basement freezer.

These genuine cream puffs, folks, are even better.


You can thank Millie for them.  I'm not fasting from meals for Lent, but the girls and I have omitted desserts and sweeteners during the week, waiting until Sundays (which aren't part of the 40 days) to add honey to our tea.  Millie's been making one fancy dessert each Sunday, too, and this one hit the spot.  I helped her in parts, but she's the one to thank for the bulk of it.

For the cream puffs, we slightly adapted the classic Fannie Farmer recipe, which follows.

Cream Puffs
(makes 28-30)

1 cup water
8 tbsp. butter
1 cup flour
4 eggs, room temperature
1 tsp. vanilla*

Preheat oven to 375 degrees.  Combine the water and butter in a saucepan and bring to a boil.  Remove from the heat and add the flour all at once, stirring vigorously with a wooden spoon.  Return to moderate heat and stir constantly until the dough leaves the sides of the pan and forms a ball. Remove from the heat and let cool for about 5 minutes.  Add the eggs, one at a time, beating hard until the dough is smooth.  Place large, rounded tablespoons of dough on an ungreased cookie sheet, 2 inches apart.  Bake for 30 minutes or until puffs are golden brown.  Prick the tops with a toothpick or skewer to let steam escape for a few minutes and, after cooling them for a bit on a rack, cut them in half.

Note: She added the vanilla to the dough, and we baked them on parchment paper-lined baking sheets instead of bare sheets.

Cream Filling (Crème Pâtissière)
Makes enough for 28-30 cream puffs.

Millie used Fannie Farmer's Basic Cream Filling recipe, and then she folded sweetened, fresh whipped cream into the chilled filling to make a lighter, fluffier filling.

2 cups milk
1 cup sugar
6 tbsp. flour
1/4 tsp. salt
4 egg yolks, slightly beaten
4 tsp. vanilla

Heat the milk in a heavy-bottomed pan until very hot but not boiling.  Mix the sugar, flour, and salt together in a bowl, stir in the hot milk, and beat until well blended.  Pour back into the pan and continue to stir vigorously over low heat for 4-5 minutes, until very thick and smooth.  Add the egg yolks and cook for a few more minutes.  Cool, stirring from time to time, then add the vanilla.

Cool completely in the refrigerator (or, if you're strapped for time like Millie was, in the freezer) before folding in freshly whipped cream.  Whip 3/4 pint of heavy cream (reserving the remaining 1/4 pint) until soft peaks form and gradually add sugar, to taste, until stiff peaks form.  Fold the whipped cream into the chilled crème pâtissière, and then place a hearty dollop of the filling onto each cooled cream puff before replacing the tops.

Chocolate Ganache Topping

Take the remaining 1/4 pint of heavy cream and heat it together with a cup or so of semisweet chocolate chips.  (We use the microwave for this.  Just heat it for 30 seconds and then in increments of 10 seconds to avoid scorching it.)  Stir together until melted and smooth.  Allow it to cool and thicken a bit until it's the right consistency for topping your cream puffs.  Melt in a few more chocolate chips if it seems too thin. Allow topping to cool and then dig in.

Note: They are best eaten fresh, as they tend to become soggy when stored in the refrigerator.

These are unbelievable, but don't give yourself a bellyache. 
(And if you do, don't say I didn't warn you.)

Thursday, July 25, 2013

A Cheater's Salted Caramel Sauce


I cheated, and I am not ashamed.  I made two batches of this easy caramel-- two, because I thought I'd ruined the first batch.  It turned out that we all preferred the ruined one on the left, though, to the pristine one on the right, so I'll tell you what to do for both.


Use this to top cheesecake, ice cream, desserts, or your tongue.


Cheater's Caramel Sauce

-1/2 cup butter
-1/2 cup brown sugar
- 1 cup sweetened condensed milk
- coarse sea salt, to taste

Melt butter and sugar together in a saucepan until the sugar dissolves into the butter.  Add the sweetened condensed milk and raise the temperature gradually until it starts to simmer, stirring constantly.  Cook and stir the mixture for about 20 minutes until the color changes to a rich golden brown.  Add salt, to taste, and stir.  (This means that you'll have to actually taste the stuff, probably more than once, and, if you're me, several more times to be safe.)

*Important note: To make the caramel on the left, with delicious, crunchy bits of toffee goodness in it, stir the butter/sugar mixture over medium heat until the color begins to deepen slightly, and then add the condensed milk. Stir in condensed milk and continue stirring over medium-low heat until the butter/sugar mixture turns to crunchy toffee but before it turns to bitter black bits.  (How's that for technical advice?)

Vanilla Bean Cheesecake with Salted Caramel Sauce: A Non-recipe


I don't remember how I made this, but I'm pretty sure I just took a standard vanilla cheesecake base, kind of like this one, only with a cinnamon graham cracker crust, and then scraped into the batter the paste of several vanilla beans that had been soaking in some homemade vanilla extract.

Then I topped it off with some Cheater's Salted Caramel Sauce.  You can, too!  (Better yet, now that I have a temporary supply of fresh cream, make this!)

Here's an Idea: Chocolate Truffle Basket


These truffles from a Martha Stewart cookbook have been my standby since Millie was a baby.  We go waaaay back.   


A few years ago, I celebrated May Day by giving a friend from church this basket, made of chocolate, and filled with truffles.  


I rolled some of the truffles in yellow sprinkles and cut out flower petals from white card stock in order to make the daisies.  I know.  It's so cute, it's sickening.


Good news!  To make your very own truffle basket, you only need a bit of waxed paper, some ribbon, a knife, and chocolate chips!  

This is how I do it: 
Cut a circle of the desired size out of wax paper.  Melt a bag of chocolate chips and a couple of tablespoons of butter the microwave, in 30-second increments.  Stir frequently to avoid scorching.  (To be safe, use a double boiler or a bowl set on top of a pot of water on the stovetop.)  Stir until smooth, and spoon equal amounts of chocolate over each paper circle, using a teaspoon to spread close to the edges to make chocolate rounds with scalloped edges.  (Make sure you spread the chocolate thick enough to ensure easy paper/chocolate separation.) Carefully lift each covered paper round and drape it over an upturned glass, curving the edges to create a frilled effect. Let the chocolate set completely, then carefully lift off the chocolate shape and peel away the paper. With your sharp knife, poke a couple of holes through the chocolate and thread a ribbon through.  Voila!  You  just made a basket for truffle daisies!
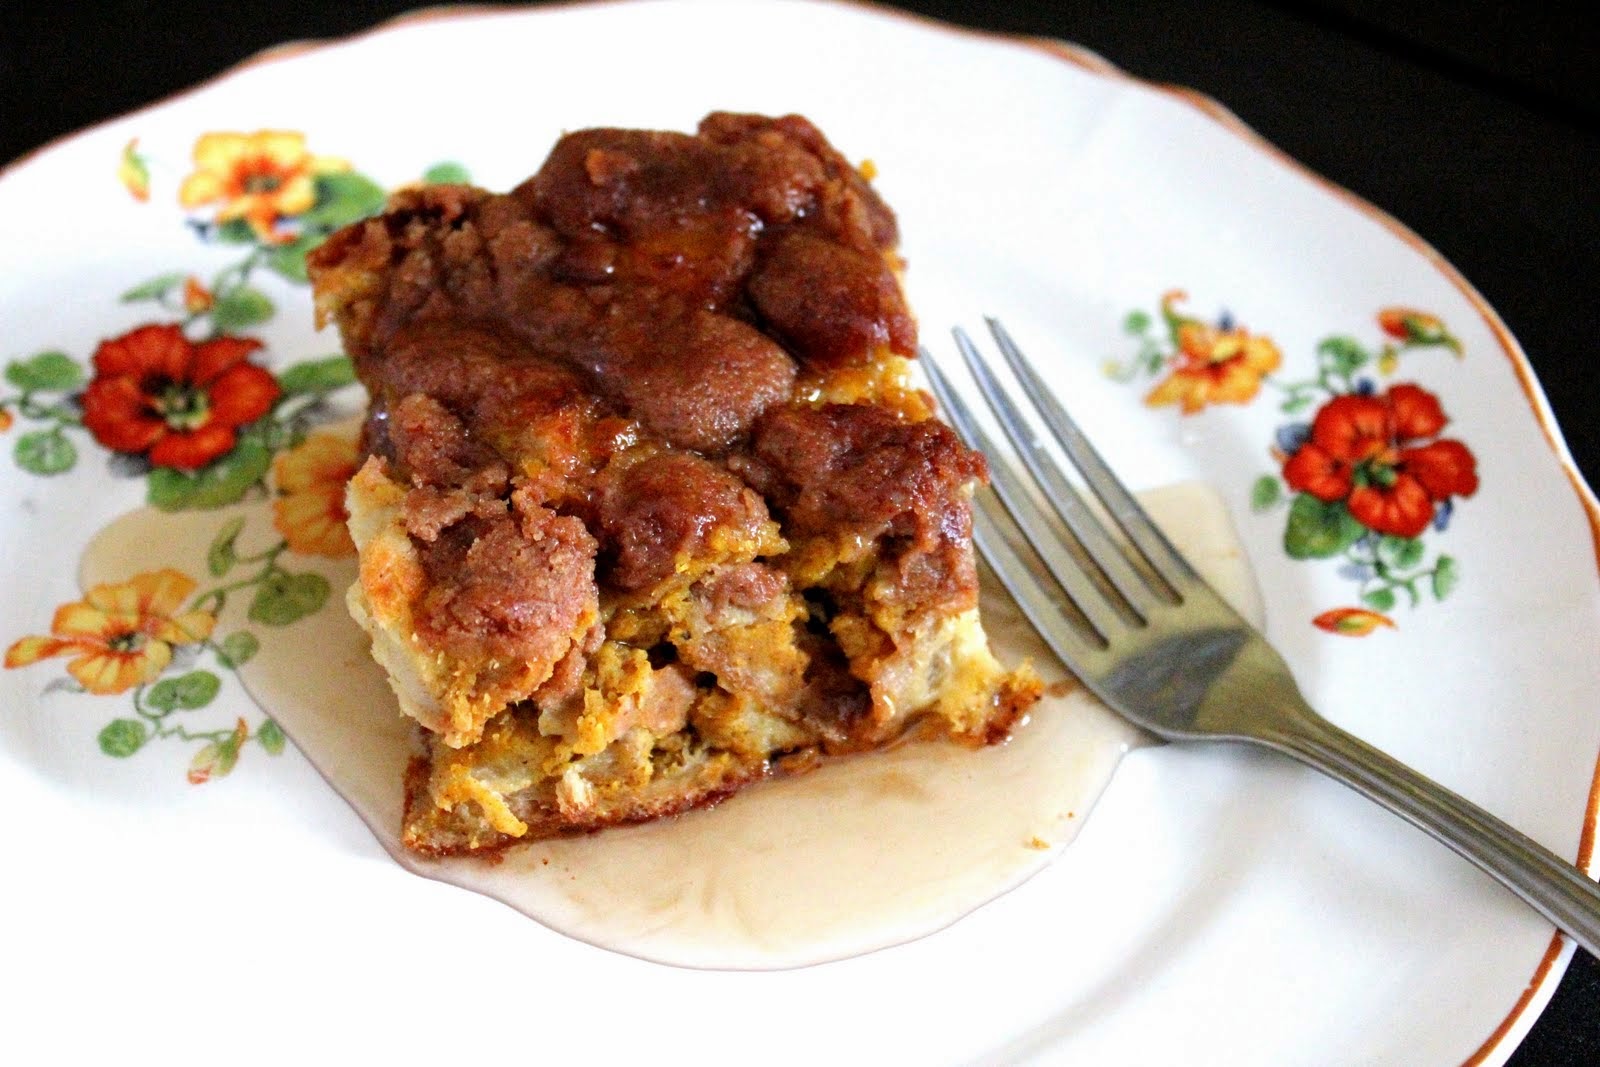
*This is also the process I've used for making cake decorations (here and here) and chocolate dessert cups.

Tuesday, March 05, 2013

Blast-from-the-Past Apple Bars


I took these pictures over three years ago with my non-fancy camera, and now they've surfaced to nobly serve the people.  Apple desserts are always noble, but this one is especially so.


I've been gobbling these since childhood, and they're actually called "Apple Pizza," but the name is misleading, and I feared readers might gloss over a recipe that deserves their closest attention and is a 100% Absolute Keeper. Hence, I changed its rightful name to a dull (but safe) "Apple Bars."  When John and I were first married, I naively would make entire batches of this, and we'd spend a week eating nothing but apple pizza.  We still both love it, which I think says something for its yummy, noble nature.

My in-laws prefer this to apple pie, and it's easier to make than apple pie.  Win-win!  It has a buttery bottom layer that's a marriage of shortbread and pie crust, a soft, apple-packed center layer, and a thick, sugar-crumb topping.  Every person to whom I've served this has professed love, the reason for which will be perfectly clear when you see how much butter it contains. 
 

Classic Apple Pizza or (if you're cautious) Apple Bars

Crust:
- 2 and 2/3 cup flour
- 1 tsp. salt
- 1 cup butter
- about 6 tablespoons cold water*
*If you're crazy, you can slightly decrease the water and slightly increase the butter.

Filling:
- about 8 large apples, peeled and sliced
- 1 tsp. cinnamon (I always dump in lots more; nutmeg and/or orange peel are optional, and I don't usually add them)

Topping*:
- 1/2 cup butter
- 2 cups granulated sugar
- 1 and 1/2 cups flour
*I one-and-a-half times this, 'cause the topping is so stinking good.  (so 3/4 c. butter, 3 c. sugar, and so on)

1. For crust, cut butter into flour and salt.  Mix in water with a fork just until moistened and pat evenly onto ungreased jelly roll pan or large, rimmed cookie sheet.

2.  Mix sliced apples with cinnamon and layer in a single layer over the crust.

3.  For topping, cut butter into sugar/flour mixture and sprinkle evenly over the entire sheet.

4. Bake at 375 degrees until apples are soft and crumb topping is golden brown.

5.  Eat five all in a row!

Monday, June 27, 2011

Streusel-Topped Rhubarb Cake with Vanilla Sauce

I am a lover of rhubarb.

There, I've said it.

Instead of applesauce, every spring I'd eat fresh rhubarb sauce that my mom would spoon steaming into bowls and onto plates. She made rhubarb crisp and rhubarb pie and rhubarb this and rhubarb that, and I loved them all. I'd even munch it plain with a puckered mouth.

This, though, even non-rhubarb lovers can enjoy, 'cause the rhubarb is mixed with enough Other that it loses some potency. And can I just say how weird it is to post pictures I took two summers ago?

Weird.


My mom made this for us when we were living in the off-grid trailer for the summer, so I couldn't immediately make it myself, but if we'd had a wood cookstove at that point, I would have tried. The cake itself is standard-- sweet cake, tart rhubarb, and moist-- but the streusel topping pushes it up a notch, and then the vanilla sauce pushes it right over the edge.


Oh, and the best part of this recipe is its original name-- Special Rhubarb Cake. There's rhubarb in the fridge, and I think I'll make some tonight. Go and do thou likewise. Serve it to someone special today!

Special Rhubarb Cake
adapted by my mother from an unknown (to me) source

Cake
-2 tbsp. butter, softened (no substitutes)
- 1 c. sugar
- 1 egg
- 2 c. all-purpose flour
- 1 tsp. baking powder
- 1/2 tsp. baking soda
- 1/2 tsp. salt
- 1 c. buttermilk (Again, I'm cheap resourceful and always use sham buttermilk. Add 1 tbsp. vinegar to enough milk to equal one cup, let sit for five minutes, and use as you would buttermilk.)
-2 c. chopped fresh or frozen (and thawed) rhubarb.

Streusel Topping
-1/4 c. all-purpose flour
-1/4 c. sugar
-2 tbsp. butter, melted


Vanilla Sauce
-1/2 c. butter, melted (no substitutes)
-3/4 c. sugar
-1/2 c. evaporated milk
-1 tsp. vanilla extract

*When my mom gave us some of this Special cake, she was out of butter and substituted cream cheese for the butter and some of the evaporated milk, with stellar results. I usually do the same.
Mom's version of "vanilla sauce":
-4 oz. cream cheese, softened
-1+ cup confectionery sugar
-1/4-1/3 c. evaporated milk
-1 and 1/2 tsp. vanilla extract.


In a mixing bowl, cream butter and sugar. Beat in egg. Combine flour, baking powder, baking soda, and salt; add to creamed mixture alternately with buttermilk, beating just until moistened. Fold in rhubarb. Pour into a greased 9" X 9" pan.

Combine topping ingredients and sprinkle over batter. Bake at 350 degrees for 40-45 minutes or until an inserted toothpick comes out clean.

For sauce, melt butter in saucepan. Add sugar and milk. Bring to boil, and cook for 2-3 minutes while stirring until thick. Remove from heat, stir in vanilla, and drizzle over servings of cake.

For Mom's version of vanilla sauce (a.k.a. Cream Cheese Sauce), beat together cream cheese and confectionery sugar until blended. Beat in evaporated milk and vanilla extract and drizzle over cake.

Sunday, June 12, 2011

Re-resurrection. A Gift of Chocolate.

The new witching hour for buildabelly seems to lie somewhere between 10:30 p.m. and 12 o'clock midnight. I don't know why this is, and I wish it were not so. I should be sleeping! I like sleeping! I don't sleep enough.

Since the grand re-opening of buildabelly three months ago, I've posted two recipes. Yes, you read that right.

(Two.)

I was given a Fancy Camera for my April birthday but have yet to take a single picture of buildabelly food with it, so the lackluster posts to come will be illustrated by the Not-As-Fancy Camera of the last four years.

Without further ado (trumpets, please):

Recipe... Number... THREE!


Courtesy of Christmas Afternoon Dessert-- The Best Brownies Yet

I purposely added "Yet" because there's always room for improvement. I've said this before, but brownies and cheesecake are two foods that please me eternally. Even when botched, they're still good. These brownies have five essential ingredients:

#1. Chocolate
#2. Fudgy-ness
#3. Chocolate
#4. Cream cheese
#5. Yet more chocolate

Oh.
#6. And heavy cream.

Not so difficult, eh?

But for the sticklers among us, I offer an extended recipe list:

Brownie Layer
- 1/2 cup butter (BUTTER), cut into slices
- 4 oz. unsweetened chocolate, chopped (I always substitute baking cocoa and oil for baking chocolate because I'm cheap resourceful, with no ill effect)
- 1 and 1/4 cup sugar
- 1 tsp. vanilla
- 2 large eggs
- 1/2 cup flour
- 1/4 tsp. salt

Cream Cheese Layer
- 8 oz. cream cheese, room temp. (I use neufchatel- light cream cheese- because I'm...something, with no ill effect)
- 1/3 cup sugar
- 1 tsp. vanilla
- 1 egg

Chocolate Ganache Layer

 1/2-3/4 cup heavy cream
 12 oz. semisweet chocolate

I always wing the ganache topping. More cream and less chocolate makes for a thinner ganache. More chocolate and less cream makes for a more solid ganache. Take your pick!

For brownies, melt butter and unsweetened chocolate together. (If you're cheap resourceful, stir melted butter & oil together and add baking cocoa to the flour mixture). To butter mixture, add sugar and vanilla. Stir well before adding eggs, one at a time. In a small bowl, stir together flour and salt (and baking cocoa, if using) before beating into the butter mixture. Stir until smooth and glossy and spread into a 13" x 9" baking pan.

For cream cheese layer, mix cream cheese, sugar, vanilla, and egg until well-blended. Spread evenly over the brownie batter.

Bake in a 325 degree oven for about 25 minutes or until brownie just begins to pull away from the edge of the pan. (Do your brownie a favor and don't overcook.)

Meanwhile, place semisweet chocolate in a heatproof bowl. Then heat heavy cream in a small saucepan over medium heat until boiling. Pour hot cream over chocolate and let sit for a minute. Stir until smooth and glossy and spread over cooled brownies.

Let the ganache layer cool before eating. (Put the pan in the freezer already!)

I triple-dog dare you to eat just one.


Sunday, March 13, 2011

Chocolate Peanut Butter Cheesecake, Or, The Never-Ending Love Affair


I said I'd have new recipes by the end of the week, didn't I? Of course, it's now the beginning of the week, and this is only one recipe, but it's a cheesecake. Cheesecake doth cover a multitude of sins. It also doth cover a multitude of broken New Year's resolutions, so have at it!

I am sorry for not keeping my word. John Wayne was hit by a car a few days ago, and I plumb forgot about buildabelly. He's alive in our basement as I type, and, hopefully, he now associates cars with excruciating pain and a cast (and not with a comfy basement pad that replaces his outdoor doghouse).

Oh, yeah. CHEESECAKE!

I made this a while back when a visit from some friends provided the excuse. I hadn't made a cheesecake in a couple of years, so it was due time. She and I both appreciate cheesecake appropriately, but I don't think the boys cared much, either way. (Weirdos.)

Without further ado, may I present Peanut Butter Chocolate Cheesecake? I'll do my best to give you the actual amounts I used. I wasn't kidding, Molly, when I said I can't read some of these scraps of paper! I jotted down what I used as I made it, but my memory's a bit garbled, and this sorry scrap of paper isn't clearing much up. Don't worry. Cheesecakes are foolproof!


For the crust:
3 cups crushed chocolate sandwich cookies
1/3 cup butter, melted
Combine in a bowl, then press across the bottom and up the sides of a greased 9-inch springform pan. Bake in a 350 degree oven for 5 minutes and then cool completely.

For the filling:
-four 8 oz. packages cream cheese, softened (I know it's anathema in some circles to use neufchatel, but I nearly always do. The texture isn't quite as firm, but my arrhythmically beating heart hopefully isn't as clogged, either.)
-1 cup granulated white sugar + 1/2 cup brown sugar
- 5 eggs
-2 tsp. vanilla
-3/4 cup peanut butter
-1/4 cup heavy cream
-1 tbsp. cocoa powder

Mix the cream cheese and sugars until smooth; add eggs one at a time and beat just 'til combined. Add vanilla and beat just 'til combined. Divide the batter, placing roughly 2/3 in a separate bowl and keeping 1/3 in the mixing bowl. Add peanut butter, heavy cream, and cocoa powder to the remaining one third and beat just 'til combined. Pour the chocolate-peanut butter mixture onto the chocolate crust and smooth it until level. Spoon the vanilla layer over the peanut butter mixture, taking care to cover it without using much smoothing "pressure" so that the layers don't mix into one another (if that makes sense, great; if not, then just dump it on). Bake it a 350 degree oven for about 45 minutes, or until the sides begin to pull away from the pan and the center is nearly set. (Sides will be puffed and set, and center will move slightly when shaken.) Cool in a cracked-open oven for ten minutes. Carefully run a knife around the edge of the pan to loosen the crust. Cool for one more hour, top with ganache, and then refrigerate overnight to let the flavors ripen.

For the ganache topping:
-some semisweet chocolate chips
-some heavy cream
-some vanilla
*I just added chocolate until it appeared the consistency I wanted, but it was probably roughly one part cream to two parts chocolate-- 1/2 cup cream and 1 cup chocolate chips is a good start, or 1 cup cream to 2 cups chocolate chips, because having extra to lick from the spoon is never a bad thing.

Heat some heavy cream in a small saucepan until boiling. Pour it over some semisweet chocolate chips that you've had the forethought to place in a heatproof bowl. Let sit until melty (yes, that's a valid word). Stir until smooth and combined, add a smidge of vanilla extract, and then pour over the cooled cheesecake. Refrigerate cheesecake overnight or for at least 8 hours.


Then, eat it for breakfast the next morning. (You! Not ME, for Pete's sake.)

Thursday, March 19, 2009

Smurtles is a Silly Name


But, please, please, please don't turn your nose up at these because of their silly name. SMURTLES simply means HEAVENLY. You heard it here first.

Don't let the funky orange tinge of these pictures turn you away, either. There's no way that piece was going to last until the sun provided natural light the next morning.

My niece Cassie made these last week, and because my sister wants me to remain happy and chubby, she brought one over for me to sample. Oh. My. Galoshes.

They are marvelous, to die for (hypothetically), delectable, and all the other flattering adjectives, too. Christine Boren of Provo, Utah, created this recipe. (I'm sorry that I think "Smurtles" is a funny name, Christine. Thank you for giving these to the world.)


1 and 1/2 cups quick oats
1 and 1/2 cups all-purpose flour
1 cup packed brown sugar
1/2 tsp. baking soda
1/4 tsp. salt
1 cup (2 sticks) butter (no substitutes), melted
1 package (14 oz.) vanilla caramels
1/2 cup heavy whipping cream
1 and 3/4 cup semisweet chocolate chips (but who's gonna care if you use 2 cups, eh?)

Preheat oven to 350 degrees F. Lightly grease a 13" X 9" pan. ('Cause those two sticks of butter won't be enough...)

Combine oats, flour, brown sugar, baking soda, and salt in a large bowl. Add melted butter; stir until well combined. Press half of the mixture onto bottom of prepared pan. Bake for 10 minutes.

Combine caramels and whipping cream in a medium saucepan. Cook over medium-low heat, stirring occasionally, until caramels are melted and mixture is smooth. Sprinkle morsels over baked crust. Drizzle caramel mixture evenly over the chocolate morsels. Sprinkle remaining crumb mixture over caramel layer.

Bake 18-20 minutes or until top is light brown. Cool in pan on wire rack. Cut into bars.

*Since I didn't actually make these, I can offer no tips or suggestions but one: EAT THEM HOT. EAT THEM WARM. EAT THEM COLD.
(Eat them with your trousers rolled.)

Tuesday, January 27, 2009

Brownies with Brown Butter Frosting

A.K.A. "I Just Ate Three Sticks O' Butter!" Brownies


If you like the toffee twist of brown butter frosting, like this ponderous baker does, give these squares a try! The brownie layer may not have been the best homemade brownie recipe I've ever tried, maybe a bit less moist than I like, but I wouldn't know because after topping them with brown butter frosting, I thought that maybe, just maybe, my brother and his family wouldn't like the toffee twist of brown butter frosting. In a stroke of heart-clogging genius, I topped the topping with a layer of chocolate fudge frosting. Crazy. Who even cares about the brownie underneath?

Now, I know there are a million recipes out there claiming to be The Best Brownies EVER, and I'll make no such claim for these. It's not because they're not yummy; truly, they're deliciously rich and full of fudgy goodness. No, I make no such claim because I don't trust my ability to objectively judge brownies. I love them ALL.


Brownies
*from Jeannette Haley's recipe

1 cup butter, no substitutes, softened
2 cups sugar
4 eggs
2 tsp. vanilla extract
2 cups all-purpose flour
1/4 cup plus 3 tablespoons baking cocoa
1/8 tsp. salt

Brown Butter Frosting
1/2 cup butter (no substitutes)
4 cups confectioners' sugar
1/4 cup plus 2 tsp. half and half (I used heavy cream leftover from truffle-making mixed w/milk)
2 tsp. vanilla extract

Fudgy Chocolate Frosting
*No pun intended, but I totally fudged this. The amounts below are approximate.
Melt about 1 cup chocolate chips together with 1/2-1 tablespoon butter and some heavy cream. Stir until smooth and glossy.

In a mixing bowl, cream butter and sugar. Add the eggs, one at a time, beating well after each addition. Beat in vanilla. Combine flour, cocoa, and salt; gradually add to the creamed mixture. Spread into an ungreased 13" x 9" pan. Bake at 350 degrees for 25-30 minutes or until a toothpick inserted near the center comes out clean. Do not overbake (although, if you do, perhaps layering on a THIRD topping would offset your mistake...). Cool on a wire rack.

For brown butter frosting, cook and stir butter over medium heat in a heavy saucepan for 5-7 minutes or until golden brown. Pour into a mixing bowl; beat in the confectioners' sugar, cream, and vanilla. Frost cooled brownies. Prepare Fudgy Chocolate Frosting, if desired, and spread on top of brown butter frosting.

Eat ten or so and then blame me for your bellyache.
(It's okay. I give you permission.)

Thursday, October 30, 2008

"I" is for Vanilla Custard Ice Cream


Thanks to our old-fashioned ice cream machine and the mighty strength of our windmill arms, we made some before the cold weather came.


It's creamy and rich, similar in taste to a frozen version of crème patisserie. It's very easy to eat. At least, I found that to be true...but, really, I dare you to show me an ice cream that isn't.


Recipe:

8 egg yolks
1 pint (2 cups) whole milk
1 pint heavy cream
1 cup granulated sugar
2 tsp. real vanilla extract, or to taste

Heat milk in a pan until it's very warm but not boiling. In a bowl, beat and mix together the egg yolks and sugar until thick. Pour the milk into the mixture of egg yolks and sugar while stirring. Pour the mixture back into the pan and heat gently, stirring until the custard thickens. Do NOT bring to a boil. When you can see a film form over the back of your spoon, remove the pan from the heat and set aside to cool. When the custard base has cooled, stir in the cream and the vanilla. Cool mixture completely. Transfer the mixture into an ice cream and freeze according to the manufacturer's instructions, or, like us, according to the mighty strength of your windmill arms!