Thursday, July 09, 2015

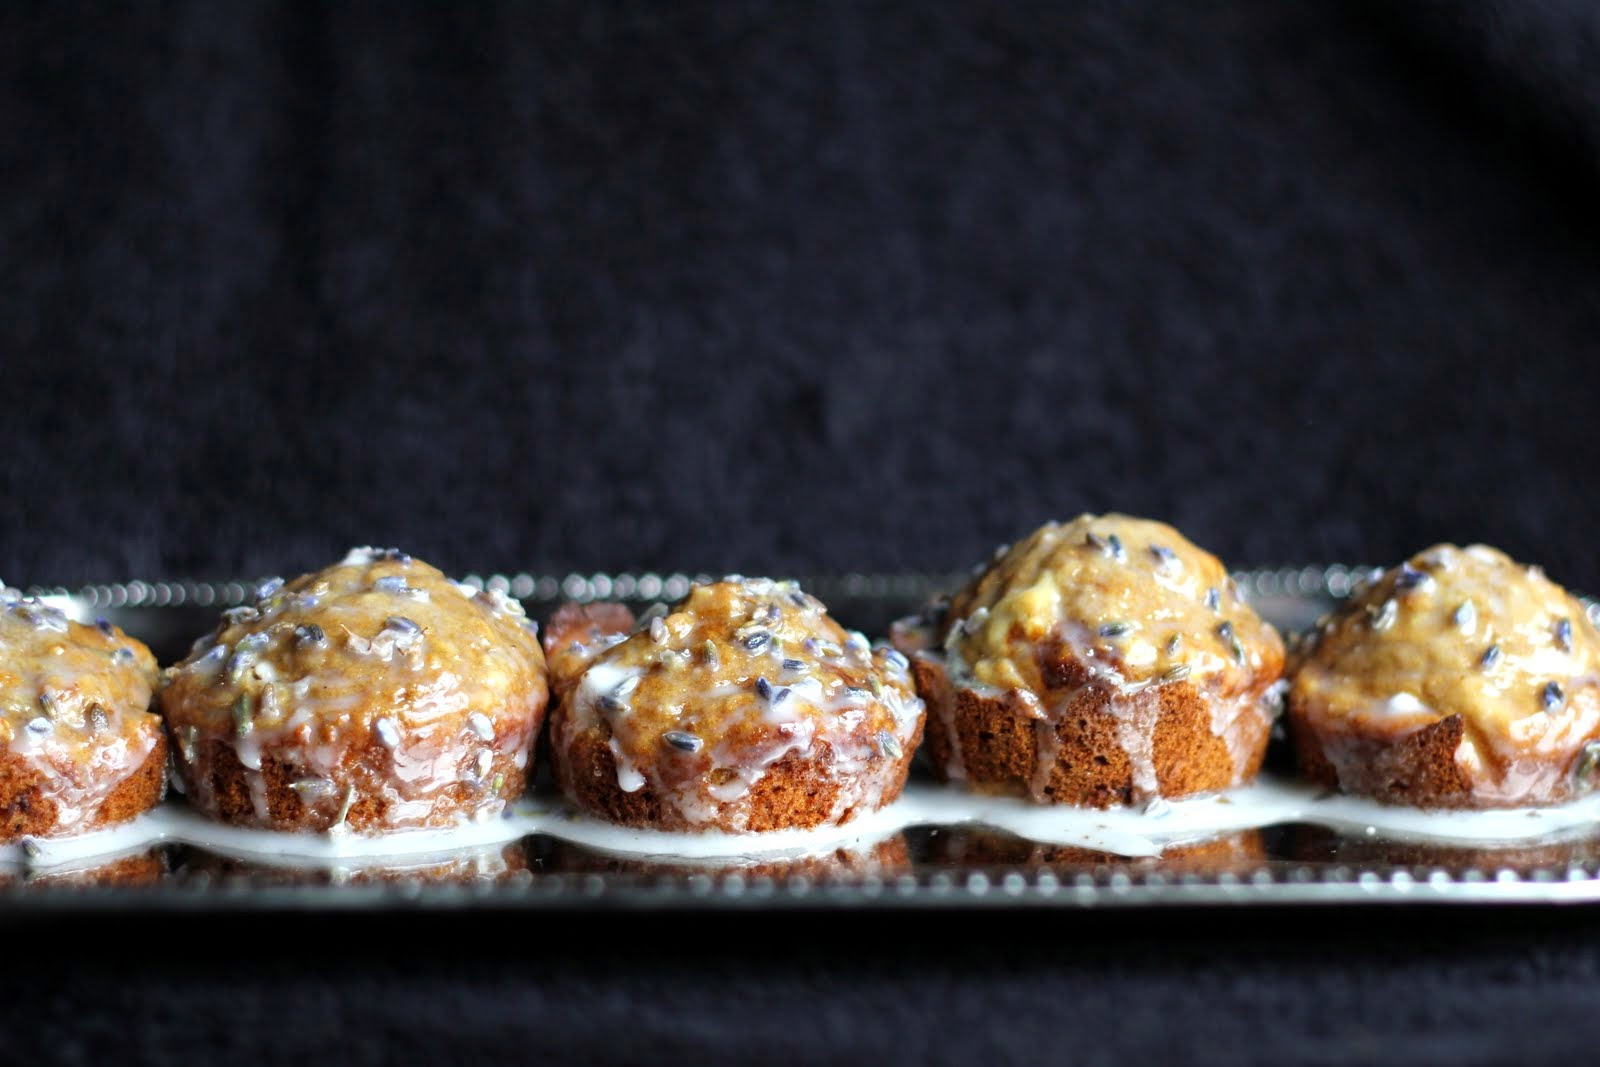
Frosted Lavender Muffins


I already explained Mildred's misplaced birth, so you've probably guessed that she's the genius behind these muffins.


Next time, she wouldn't add so many lavender buds to the glaze (she added more than the recipe called for), and she left the buds in instead of removing them, but these were excellent muffins. The flavor of lavender came through quite prominently in the glaze because Millie left the buds in, but I imagine the flavor would be much more delicate if the buds were removed before frosting the muffins.
Frosted Lavender Muffins

Makes 12

oil for greasing muffin tin

1 large apple, peeled, cored, and thinly sliced
3 tbsp. water
1 cup flour
1 tsp. baking powder
1 tsp. baking soda
pinch of salt
4 tbsp. butter
4 tbsp. superfine sugar (whizz granulated sugar in blender or coffee grinder or just use regular)
1 large egg, beaten
1/2 tsp. vanilla extract
1 tbsp. dried lavender flowers

Lavender Frosting

7/8 cup confectioner's sugar
1 tbsp. dried lavender flowers
1 tbsp. liquid glucose (Millie just used milk)
1-2 tbsp. milk

The day before you make the muffins (I think Millie just did it the same morning), prepare the frosting.  Place the sugar in a bowl and add the dried lavender flowers.  Cover and leave overnight until ready to use.  

When you are ready to make the muffins, place the sliced baking apple and water in a pan and bring to a boil.  reduce the heat, cover the pan, and let simmer for 15-20 minutes, stirring occasionally until the water has been absorbed.  Remove the heat and let cool .  Transfer to a food processor and process until smooth.

Preheat the oven to 400 degrees F.  Grease a muffin tin.  Sift the flour, baking powder, baking soda, and salt into a mixing bowl. 

In a separate large bowl, cream together the butter and superfine sugar, then stir in the beaten egg, vanilla extract, apple puree, and dried lavender flowers, stripped from their stalks.  Add the egg mixture to the flour mixture and the gently stir together until just combined.  Don't overstir the batter (lumpy batter is fine).

Divide the muffin batter evenly between the 12 cups in the muffin tin (fill cups about 2/3 full).  Transfer to the oven and bake for 20 minutes or until risen and golden.  

While the muffins are cooking, finish making the frosting.  Remove the plastic wrap from the confectioner's sugar/lavender mixture, then sift the mixture into a bowl and discard the lavender flowers (Millie left hers in).  Stir in the liquid glucose and enough milk to make the frosting easy to spread or drizzle.  Cover until ready to use. 

When the muffins are cooked, remove from oven and place them on a cooling rack.  When they have cooled completely, spread each muffin with lavender frosting and serve.  

Millie couldn't wait.  We ate ours warm.  :)

Homemade Marshmallow Eggs


Honestly, making homemade marshmallow squares cut out of a pan is a lot easier than making marshmallow eggs poured into a mold, but if your children, like mine, are super-excited about making eggs, here's your warning that it will be messy.


Also be warned that these are insanely good.  Your children will thank you!  Your hips will not.

 I'm going to be lazy for recipes I didn't create-- too lazy to even cut and paste.  I found the recipe here.  Go forth and marshmallow!


(Mostly) Aunt Karen's Monkey Bread


The first time I made this, the sticky, cinnamon goodness overtook me, and I ended a feeding frenzy by ruefully remarking, "I should never have touched that monkey bread."  This prompted John to share a theological insight about Eve's original sin and her feminine wisdom in recognizing that touching leads to eating leads to regret, which was a morally acceptable result of my gluttony.  (Y'like how I just justified my gluttony?!)

Also overheard at the table the first time I made it were little girls saying,
"Oh, I'm so full, but I wish I wasn't."
"If only I wasn't too full for more."
etc.
etc.

I put this under both the labels "breakfast" AND "dessert."


If these anecdotes don't convince you that Monkey Bread is worth making, I don't know what will! Aunt Karen is to blame for this recipe.  She gave it to me several years ago, and we give her our sticky-fingered thanks.

Note:  To make it easier on  yourself, ignore my directions for homemade yeasted dough and just use 4 cans of store-bought refrigerated biscuits (simply quarter each biscuit with scissors before rolling in the coating).  That's what her recipe calls for, but we never have them in the house, and we always have yeast and flour, so there you have it.


Mostly Aunt Karen's Monkey Bread

For the sweet bread (source-- Mel's Kitchen Cafe):
-  a couple tbsp. of melted butter for greasing the pan
-  1 cup warm-to-the touch milk
-  1/3 cup warm-to-the-touch water
-  1/4 cup granulated sugar
-  2 and 1/4 teaspoons yeast
-  3 and 1/4 cups all-purpose flour
-  2 teaspoons salt

For the sticky, cinnamon goodness (Aunt Karen all-the-way):
several tbsp. melted butter
3/4 cup granulated sugar
3 tbsp. ground cinnamon

plus an additional
1/2 cup butter, melted
3/4 cup brown sugar

For the glaze (Also Aunt Karen):
2 cups powdered sugar
1 tsp. vanilla
4 tbsp. milk


*If using refrigerated biscuits, skip straight to the cinnamon sugar part at #5 after greasing the pan.
  1. Grease a bundt pan with melted butter.  Make sure the entire surface (including in between those ridges) is well-greased. 
  2. Mix together the milk, water, melted butter, sugar, and yeast.  Mix the flour and salt together in a large bowl or mixer. Make a well in the center of the flour mixture, and add the liquid mixture slowly, breaking to stir and incorporate (if by hand) or by using dough hook attachment on mixer.  After the dough comes together, mix by machine or knead by hand on a floured surfaced until smooth. If you think the dough is too wet (i.e. having a hard time forming a cohesive mass), add 2 tablespoons flour at a time and mix until the dough comes together.  The dough should be sticky but not wet.  Coat a large bowl with nonstick cooking spray. Place the dough in the bowl and turn to coat lightly with the cooking spray. Cover the bowl and let rise in a warm 'til doubled. ( I usually let my dough rise in an oven that has been warmed to 150-200 degrees and then turned off. Just don't forget to turn off the oven! I warn from experience...)
  3. While the dough is rising, mix the 3/4 cup white sugar and 3 tbsp. cinnamon together in a bowl. Place a few tbsp. melted butter for dipping in a second bowl and set aside.
  4. Once dough has risen, place on a floured surface and and press it into a rough 8-inch square. Using a pizza cutter or a knife, cut the dough into 64 pieces.(Alternately, just pinch off pieces like I do.  It's messier, but it works).
  5. Roll each dough piece into a ball (it doesn't have to be perfect, just get it into a rough ball-shape). Working one at a time, dip the balls in melted butter, allowing excess butter to drip back into the bowl. Roll the dipped dough balls in the sugar/cinnamon mixture, then layer the balls in the Bundt pan, staggering the seams where the dough balls meet as you build layers. 
  6. Then, because there can never be too much when butter and sugar are involved, mix the 1/2 cup melted butter and 3/4 brown sugar.  Pour this mixture over the stacked dough balls.
  7. Cover the Bundt pan with greased plastic wrap and let the monkey bread rise until puffy and it has risen an inch or two from the top of the pan, about 1-2 hours. (Skip this part if you're using refrigerated biscuits and proceed to the baking part.)
  8. Heat the oven to 350 degrees F.  Unwrap the pan and bake until the top is deep brown and caramel begins to bubble around edges, 30 to 35 minutes. Cool the monkey bread in the pan for 5 minutes (any longer and the bread will be too sticky and hard to remove!), then invert on a platter or large plate and allow to cool slightly, about 10 minutes.  (Sometimes a few pieces fall off.  Don't fret; just pick them up and plop them back on once the whole thing is out of the pan and on the platter.)
  9. Whisk glaze ingredients together until smooth and pour over the warm monkey bread.  Serve to the adulation of anyone with a sweet tooth.
Notes:
*Aunt Karen also adds raisins and curshed nuts throughout while placing the dough pieces into the pan.  We haven't yet tried it like this, but it sounds delicious.

Simplified Kolacky


I'm mostly mutt, but I'm a quarter Polish with a bit of Scandinavia floating around in there, too, and I've been making these for as long as I can remember making things.  They were a Johnson family Christmas staple growing up.  I've only ever made "Simplified Kolacky."  Maybe someday I'll be industrious enough to make a more traditional dough, but until then, "simplified" it is!  (I like things simple. I really do.)


The dough is mildly sweet with a cream cheese base and is light and flaky when cooked.  It's the perfect balance for the rich nut filling.  Traditionally, these can also be filled with apricot preserves or jam, but I always make the lemony walnut filling because...yum.  

*Note: I always make one and a half times the filling amount listed below because it's my favorite, and I don't want to run out.  When there's extra, I bake it in a small, greased, ovenproof container until cooked through and then eat it late at night while the house sleeps and I'm frosting the gingerbread children.  (Now you know one of my dirty secrets!)


Simplified Kolacky  (source: my mother's recipe box)

Dough
1/2 lb. (1 cup) cream cheese, softened
1/2 lb. (1 cup) butter, softened
2 cups flour

Cream butter and cream cheese together and add 2 cups flour. Mix until flour is incorporated.
Divide dough into 3 balls and refrigerate for at least 2 hours.  Meanwhile, prepare filling.

Filling
Mix 2 cups very finely chopped walnuts (or other nut, if you prefer), 
1/2 cup brown sugar (packed), 
1/4 cup softened butter, 
1/4 cup milk, 
1/2 tsp. vanilla, 
1/2 tsp. lemon extract, 
and one beaten egg.
*Remember, I always make one and a half times this amount.  Munch. Munch.


Sprinkle flat surface liberally with equal amounts of flour and confectioner's sugar and roll the dough out thinly. Cut into small squares and spread with filling (not near edges), and then roll the dough squares up from corner to corner.  Place seam side down on ungreased cookie sheets and bake at 350 degrees for 15 to 17 minutes or until puffy and lightly golden.

Balsamic Poppy Seed Vinaigrette


This dressing doesn't look as nice on a bed of plain old lettuce as it did on the strawberry spinach salad for which I made it, but since I didn't take a picture of the strawberry spinach salad (because, you know, I was too busy scarfing it), here's the dressing, at least.

I really loved this dressing, and since none of the rest of my family cares for sweet vinaigrettes, I got it all to myself.  I ate it on lettuce with leftover almonds and feta for 2 days, then when the feta and almond supply ran out, I had it on plain lettuce.  I timed the lettuce shortage perfectly, because I ran out of dressing at the exact same time.  If I'd had leftover dressing, I would have slurped it from a spoon.

It's not overly sweet, but if you like your dressings wholly acidic, you'll probably skip this one. Otherwise, have at it! 

Balsamic Poppy Seed Vinaigrette


  • 1/3 cup olive oil
  • 1/4 cup sugar (or less, to taste)
  • 3 tablespoons balsamic vinegar (I used more, to taste)

  • a pinch of dry mustard powder
  • 1 tablespoon poppy seeds
  • 1/4 teaspoon paprika
  • 1/4 teaspoon Worcestershire sauce

Whisk all ingredients together until well-incorporated.  Drizzle as desired.

Carrot Cake Trifle-- a Non-Recipe


Take the best carrot cake recipe and halve it, baking it in a 13 X 9 pan, instead.

Fold whipped cream into vanilla pudding and spoon the cake pieces and pudding mixture in layers, topping the whole thing off with whipped cream and cake crumbs.

Mister Rabbit approves.

What a Trick! (How to Cut Corn Off the Cob)


I posted this to shotsnaps last year, but it's worth copying here.
______________________________________

Confined to my room with a whopping spinal headache from the c-section after Piper's birth and unable to hold her yet because she was on oxygen in the nursery, I turned on the television.  A friendly chef then proceeded to share a corn-cutting method that changed my life.  In the past, when preparing corn to freeze for winter, I cut it on a cutting board. The kernels would fly east, west, north, and south.  No longer.  

In case you need a life-changing, corn-cutting method, here it is.  Place a small bowl upside-down inside a larger bowl.  The top of the smaller bowl should be about even with the lip of the larger bowl.  The larger bowl contains the falling kernels, and, if your large bowl is big enough, you can whip through 5 dozen ears without having to stop to bag any up.  

Life-changing.  
You're welcome.

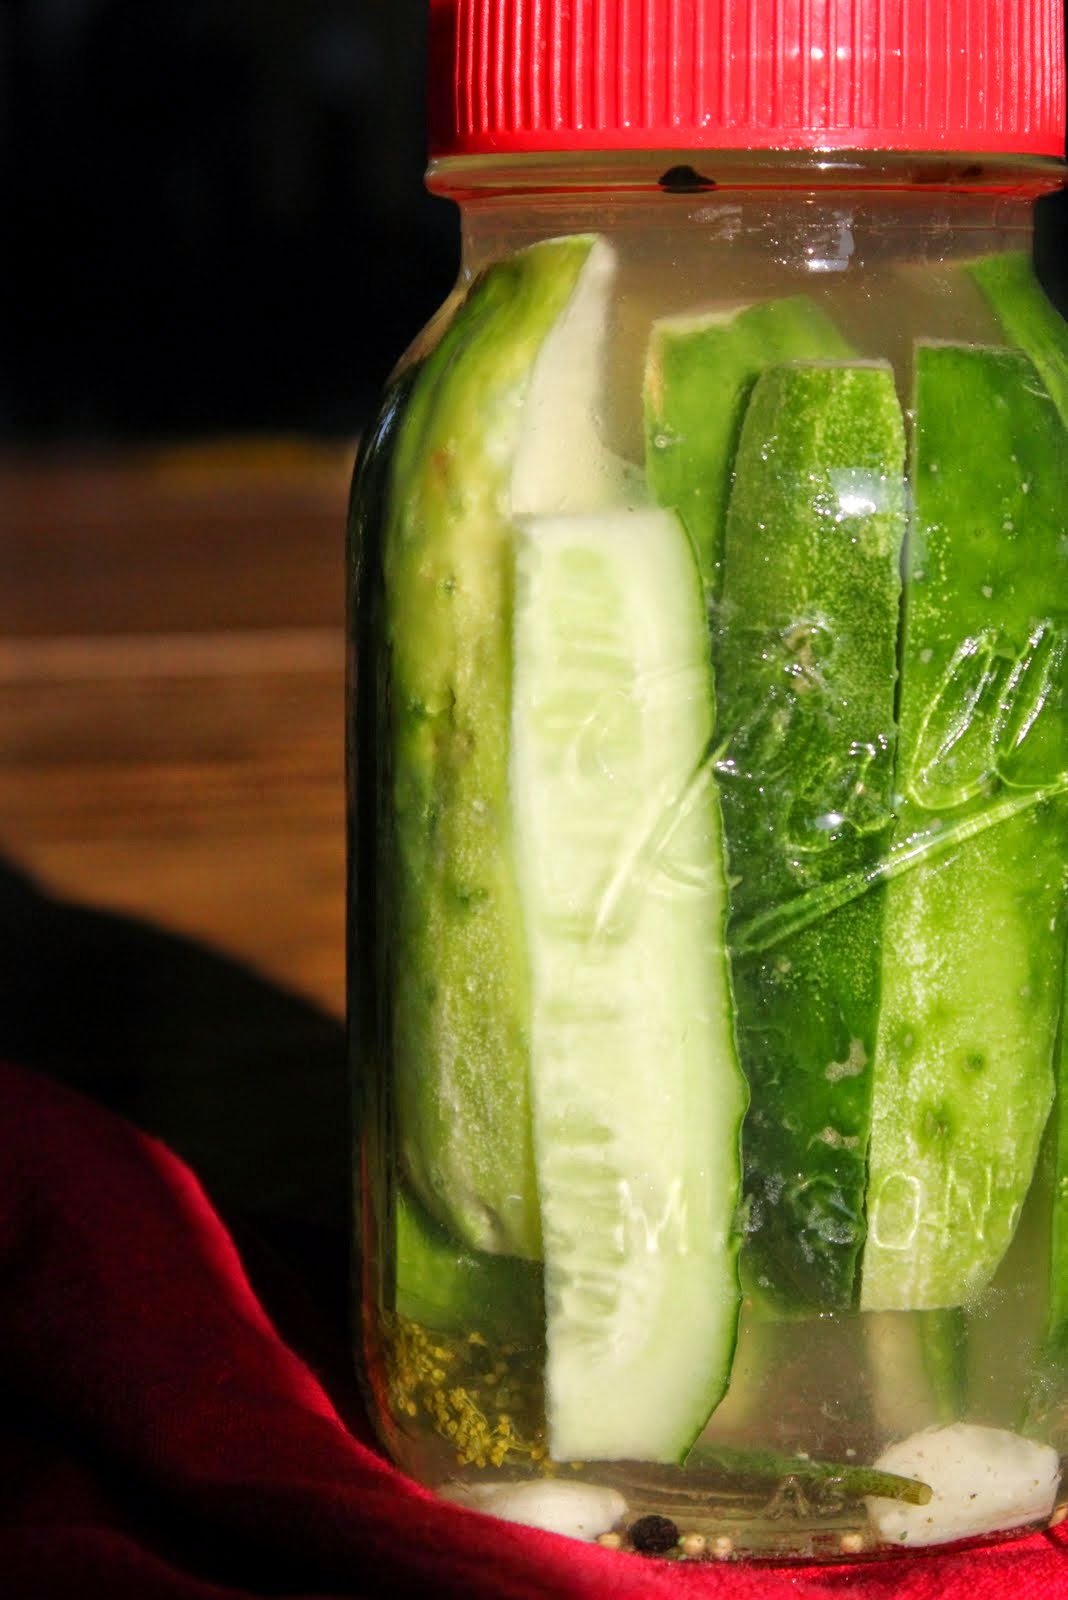
Dill Refrigerator Pickles


Last summer, I only canned pickles when we had more than we could gobble fresh.  We prefer these fresh pickles to the canned ones, though it was still nice to store some to get us through the winter.  Cold and oh-so-crunchy fresh from the refrigerator, they're hard to beat.  They keep for weeks, but they never last that long around here.  They can be sliced in coins, too, if you're hankering for crunchy pickles on your burgers.

Crunchy Refrigerator Pickles

Prepare your favorite pickle brine (ours is below)

Kosher Dill Pickle Brine

For one quart jar:

2 or 3 garlic cloves, split 
1/8 cup (2 tbsp.) pickling salt 
1 and 1/2 cups white vinegar
1 and 1/2 cups water
1- 2 heads fresh dill (depending on the size of the head!)
4 black peppercorns 
1/4 tsp. mustard seed

Add sliced cucumbers, dill, peppercorns, and mustard seed to jar.  Bring remaining brine ingredients to a boil and stir to dissolve salt.  Pour over cucumbers into the quart jar, covering them.  Once brine cools, place in refrigerator for at least 8 hours for best flavor.  Reserve extra liquid, if there is any, to add to jar when brine weakens.  Add more cucumbers as needed through the weeks and strengthen or replace brine when necessary.  

*We've not tried this yet, but an alternate method is to salt the cukes first to draw out water for 30 minutes or so before rinsing them and proceeding as normal. This would prolong the strength of the brine.

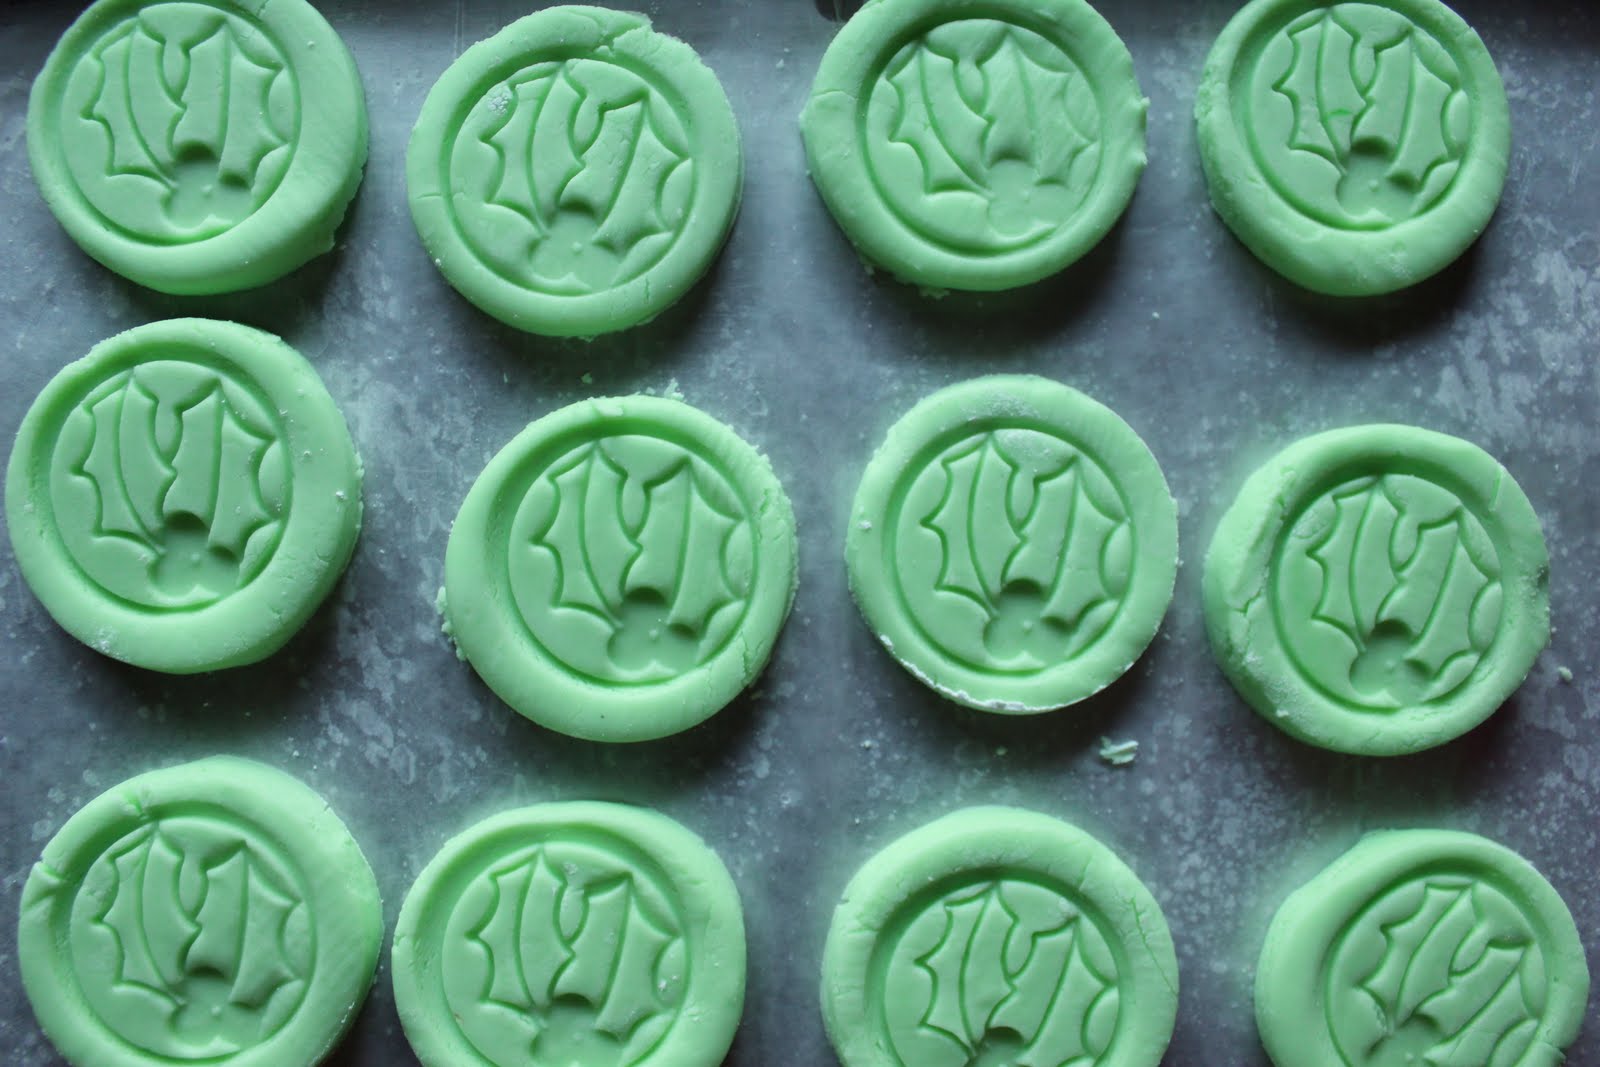
Melt-in-Your-Mouth Butter Mints


These are my preferred butter mints not only becuase they taste so rich and delicious, but they are so stinking easy to make.  (I like simple things, remember?)  It's possible to whip them up at the last minute for parties or gift-giving, or both.  I should know.


Melt-in-Your-Mouth Butter Mints

1 stick (1/2 cup) butter, room temperature
4 cups confectioners' sugar, plus additional for rolling
1/4 - 1 teaspoon peppermint extract, to taste
1/2 tsp. vanilla extract
1 and 1/2 tablespoons milk
food coloring, if desired

Cream the butter with the paddle attachment of your mixture until light and fluffy.  Add the sugar and extracts until mixture is thick and smooth, then slowly add milk, a bit at a time, until mixture reaches good molding consistency.  I usually add milk and/or confectioners' sugar until the mixture is easy to mold, almost like play-dough. Add coloring, if desired, and mix until spread throughout.

For making mints, dust your work surface lightly with confectioners' sugar or layer with waxed paper and do one of the following:
1.  Roll dough into logs about 1/2" in diameter before cutting off 1/2" pieces for traditional-sized butter mints.  Place on waxed paper or parchment paper to dry, uncovered, for several hours or overnight.
or
2.  Roll chilled dough out between two pieces of waxed paper to 1/8-in. thickness (or on confectioners' sugar-dusted surface) and cut into desired shapes.  Place on waxed paper to dry, uncovered, for several hours or overnight, flipping at least once.
or
3.  Roll dough into balls, smush balls using the flat end of a drinking glass to desired thickness, and/or press down using the tines of a fork to make decorative marks.  Place on waxed paper to dry, uncovered, for several hours or overnight, flipping at least once.

Place mints in airtight container in between layers of waxed paper and store for up to 2 weeks.  If weather is hot, mints should be refrigerated because of the butter content.

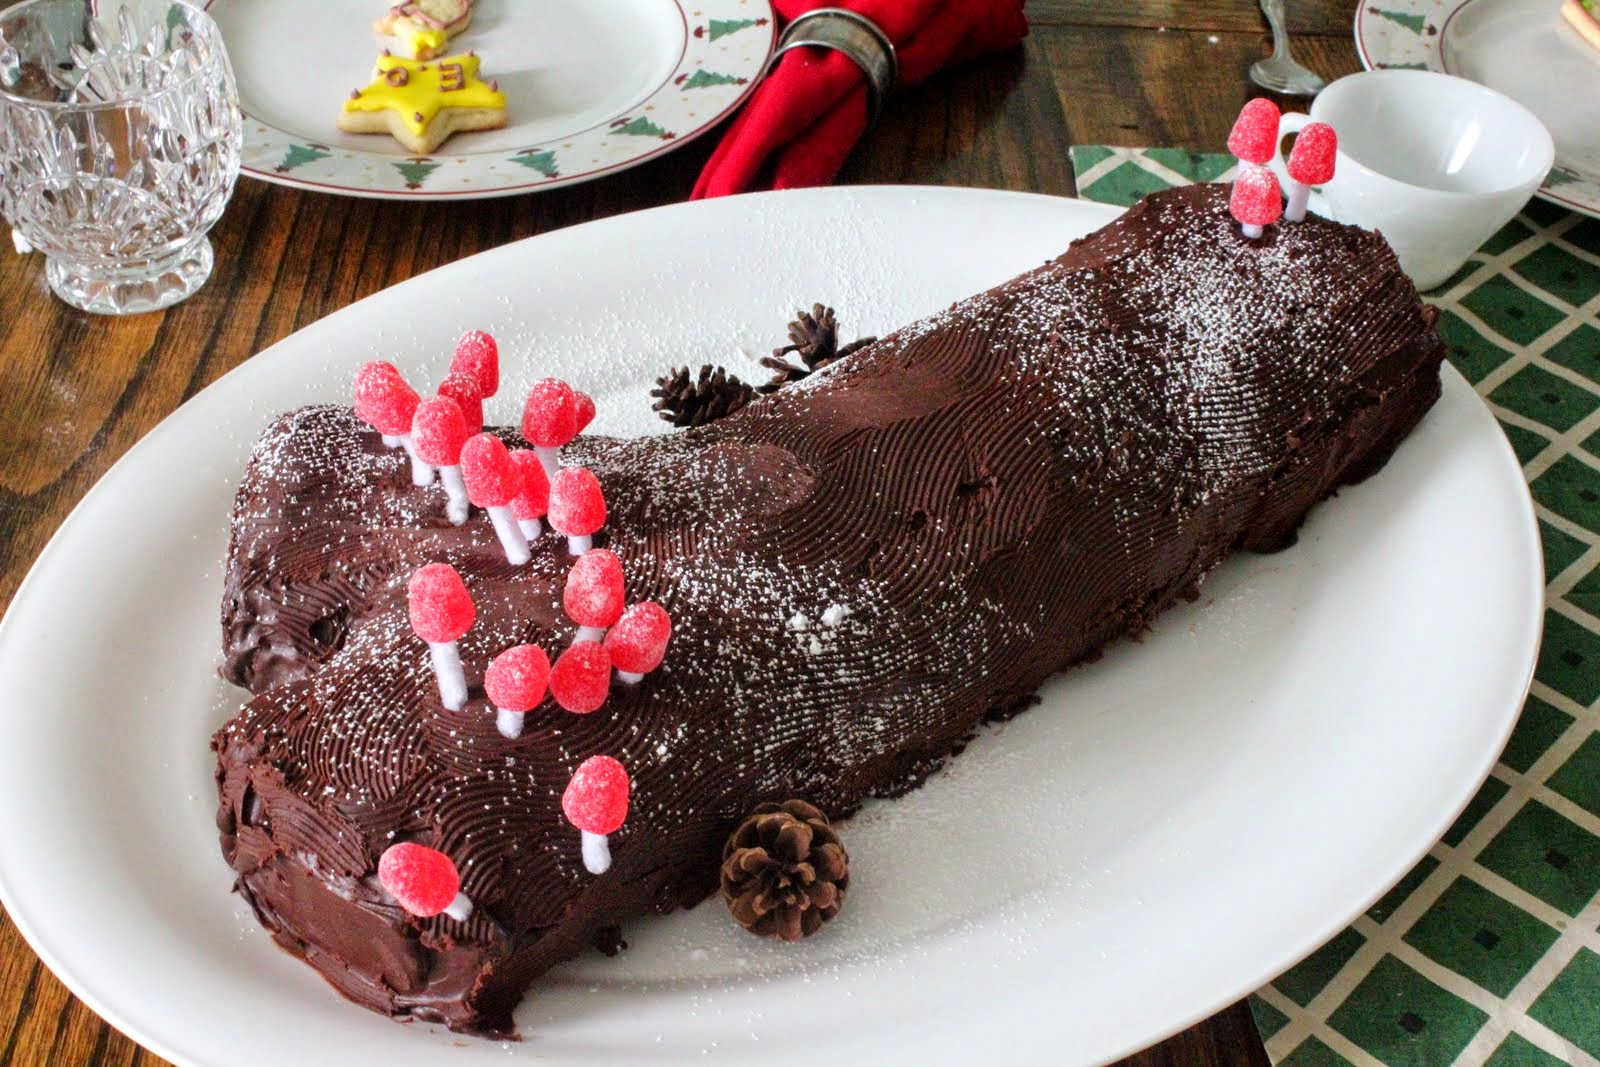
Two-Thumbs-Up Yule Log Cake (Buche de Noel)


I love this decadent cake, and I've made it twice now, just to make sure.  I'm sending all you chocolate sponge cake/whipped cream/ganache lovers here, so you can make your own.  My changes: I preferred to skip the cocoa powder in the whipped cream, leaving it vanilla, I doubled the recipe and cooked it in two pans in order to make a longer log, and I topped it with chocolate ganache, which not only balances out the lighter cake with a crazy-rich topping, but also allows the "bark" texture for the log.  I was also too lazy/strapped for time to make the meringue mushrooms, so I used pipe cleaners and gumdrops for the toadstools.

Monday, March 24, 2014

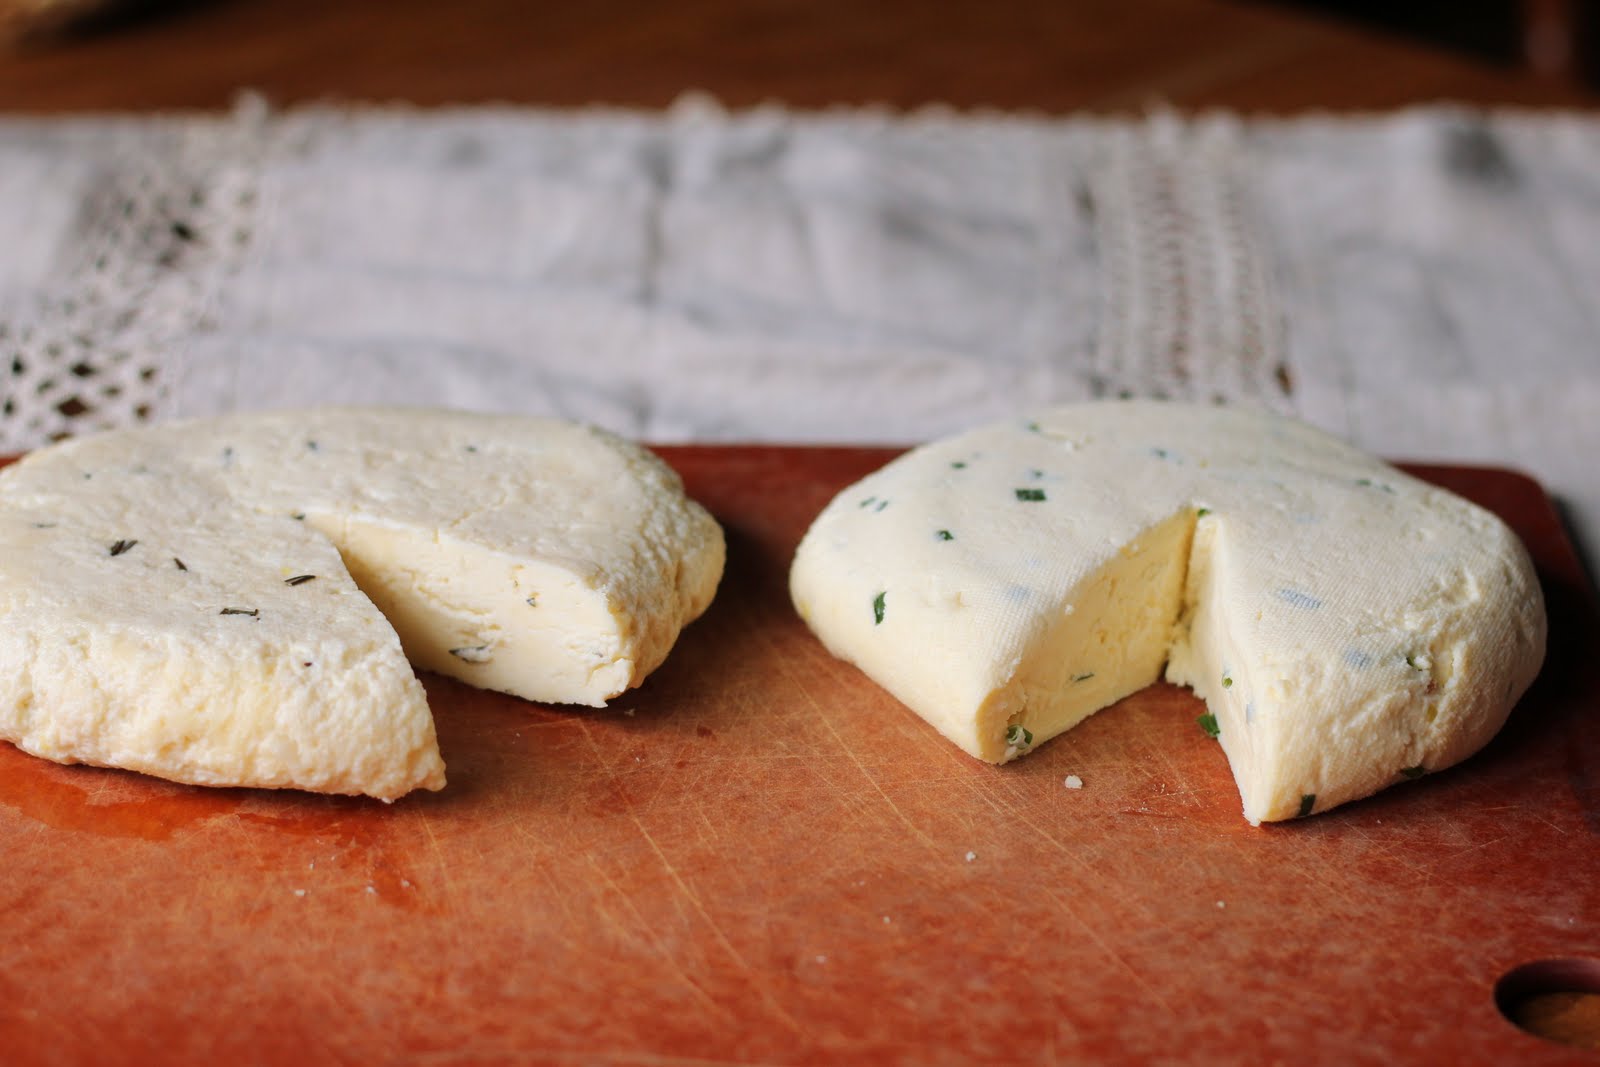
The Easiest Cheese Ever, Or, Farmer's Cheese (Or Paneer)


Seasoned or plain, this cheese is hard to beat for ease of preparation and delicious flavor.


I don't exaggerate when I say this cheese takes under ten minutes to make. Then you just let the whey drain, and you're set!  Because it takes too much dinero to buy raw milk, we just buy regular store milk.  As long as it's not ultra-pasteurized, it turns out fine.

$2.05 for one gallon of regular, pasteurized milk + ten minutes = one pound of cheese and a giant bowl of whey to use for baking, to add to shakes, soups, or sauces, or for feeding your chickens.
Not too shabby, huh?

Here's what you need:

-one gallon whole milk
-1/2 cup white vinegar (to make traditional paneer for Indian cuisine, substitute lemon juice for the vinegar)
-salt and/or seasonings
-a large, heavy-bottomed pot
-a colander
-a double layer of cheesecloth

Not necessary but fun to have
-a cheese press, the Real Deal or a makeshift one (to see my makeshift press, see below)
-helper elves to squeeze out whey faster (ditto)

Pour milk into pot and bring milk to a gentle boil over medium heat, stirring frequently.  Turn off heat and add the vinegar (or lemon juice) to pot while stirring constantly.  Within a short time, you should see the curds begin to solidify near the top of the pot, leaving the greenish-yellowish whey behind.  Once they've all separated, remove pot from the burner and carefully pour into a colander lined with your double layer of cheesecloth and resting over a large bowl to catch the whey.   At this point, you can add salt or seasonings, as desired-- for farmer's cheese, we add one tablespoon salt--, mixing them gently into the hot curds.  Note!  If you don't want your large bowl of whey to become flavored with seasonings or salt, then transfer the cheesecloth to another bowl before adding seasonings and squeezing out the rest of the whey.

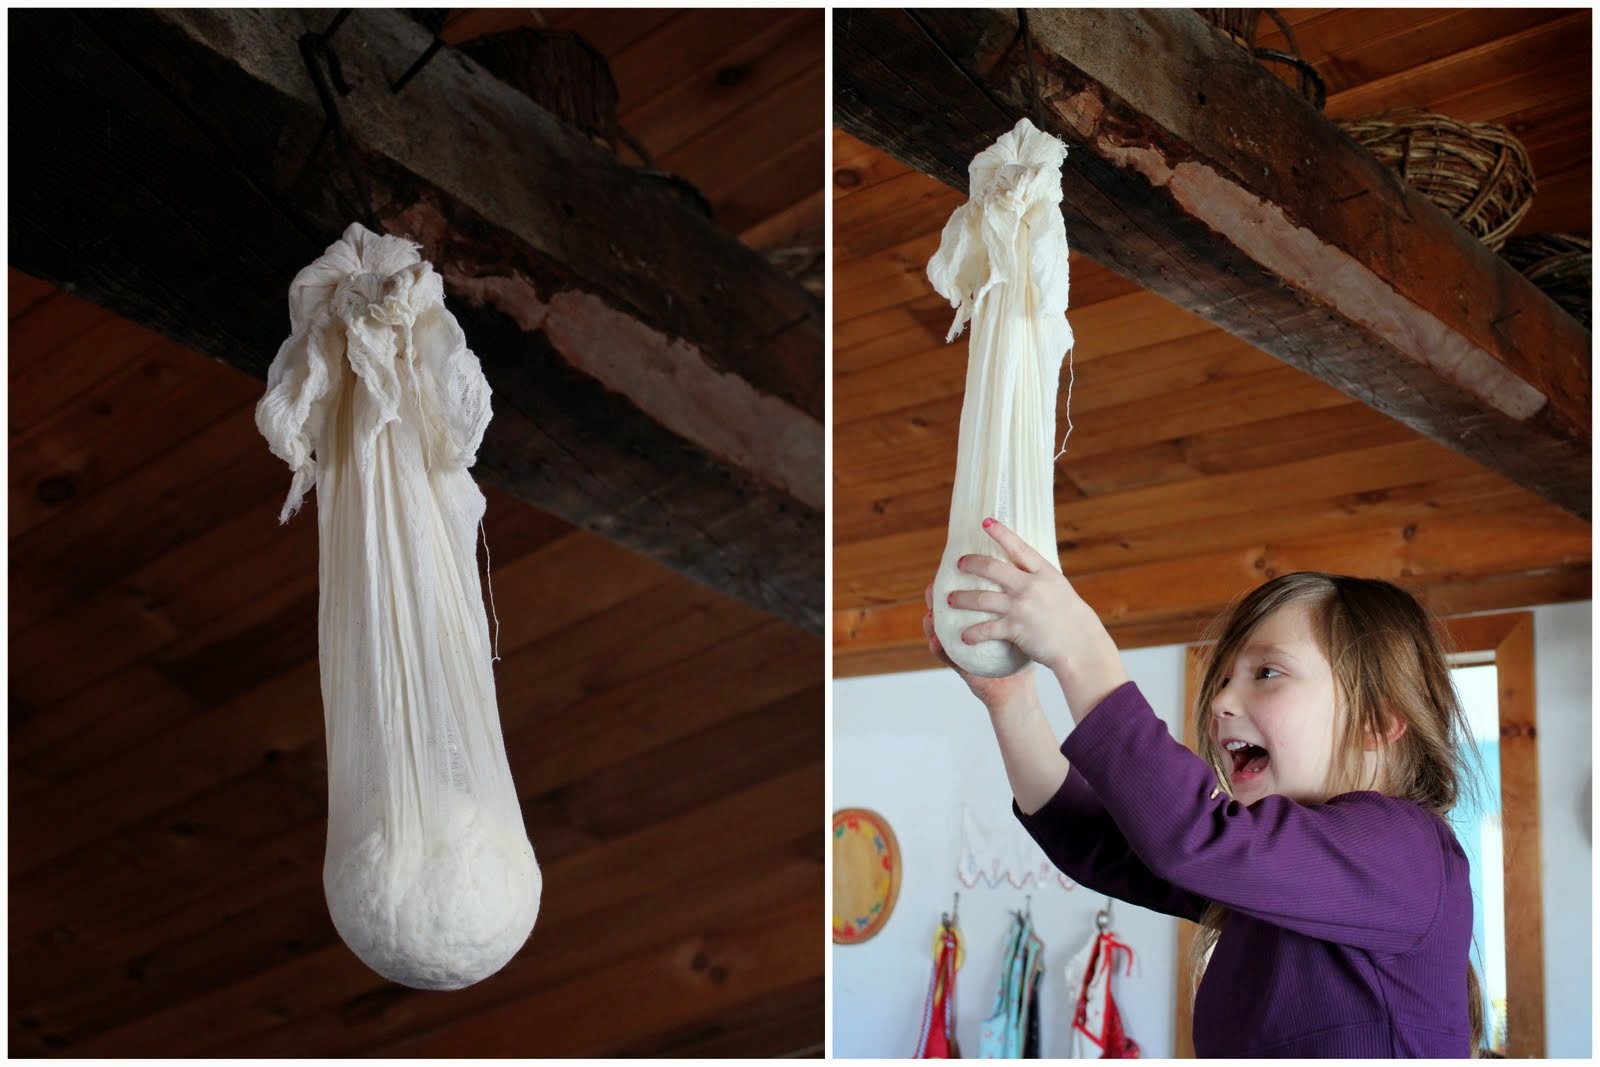
Once your seasonings are mixed in, lift the cheesecloth and twist it around the ball of cheese, squeezing to remove excess whey.  Then tie it on something high (a kitchen beam, a wooden spoon you slide into your upper cupboard's handles, the sink faucet, etc.) to drain out additional whey for about five minutes.  If you stop here, you'll end with a delicious, mild, crumbly cheese for salads, munching, curries, etc.


For a firmer, slicing cheese, squeeze out the whey as shown and then take the cheesecloth filled with still hot curds and place in a cheese press.  Don't have a cheese press?  No problem.  Just place it on a plate with the excess cheesecloth on the side to ensure a smooth top to your cheese.  Place a second plate on top of the cheese and weigh down the top plate with enough Heavy Stuff to press out the last of the whey and compress the cheese curds into a solid disc.  Refrigerate until firm and then gobble whenever you feel the urge.

Notes: If you make paneer using the lemon juice, you can gently rinse the curds with water after you drain them into the colander in order to remove some of the lemon flavor, if you want to take the extra step.

My current cheese press was given to me by Mrs. Terry and is showcased below.  A large coffee can with nail holes punched along the bottom edge works well.  Place the cheese inside, top it with a small saucer, and weigh down the saucer with Heavy Stuff.  Voila!  Slicing cheese!


Cream Puffs

...because buildabelly needs them.  Because YOU need them.


 I haven't made cream puffs since I was fourteen years old.  After each break, when my parents drove my older sister back to college, I'd make something elaborate from the cookbook to sustain my older and younger siblings and myself while they were gone.  The offerings were predictable: divinity (always a sickly-sweet winner), molasses taffy, cookies and cakes of all kinds, and...cream puffs.  The funny thing is that I only made the puffs and not the cream.  We were so hungry by the time the puffs emerged golden-brown from the oven that we just filled the shells with Christmas m&ms from the basement freezer.

These genuine cream puffs, folks, are even better.


You can thank Millie for them.  I'm not fasting from meals for Lent, but the girls and I have omitted desserts and sweeteners during the week, waiting until Sundays (which aren't part of the 40 days) to add honey to our tea.  Millie's been making one fancy dessert each Sunday, too, and this one hit the spot.  I helped her in parts, but she's the one to thank for the bulk of it.

For the cream puffs, we slightly adapted the classic Fannie Farmer recipe, which follows.

Cream Puffs
(makes 28-30)

1 cup water
8 tbsp. butter
1 cup flour
4 eggs, room temperature
1 tsp. vanilla*

Preheat oven to 375 degrees.  Combine the water and butter in a saucepan and bring to a boil.  Remove from the heat and add the flour all at once, stirring vigorously with a wooden spoon.  Return to moderate heat and stir constantly until the dough leaves the sides of the pan and forms a ball. Remove from the heat and let cool for about 5 minutes.  Add the eggs, one at a time, beating hard until the dough is smooth.  Place large, rounded tablespoons of dough on an ungreased cookie sheet, 2 inches apart.  Bake for 30 minutes or until puffs are golden brown.  Prick the tops with a toothpick or skewer to let steam escape for a few minutes and, after cooling them for a bit on a rack, cut them in half.

Note: She added the vanilla to the dough, and we baked them on parchment paper-lined baking sheets instead of bare sheets.

Cream Filling (Crème Pâtissière)
Makes enough for 28-30 cream puffs.

Millie used Fannie Farmer's Basic Cream Filling recipe, and then she folded sweetened, fresh whipped cream into the chilled filling to make a lighter, fluffier filling.

2 cups milk
1 cup sugar
6 tbsp. flour
1/4 tsp. salt
4 egg yolks, slightly beaten
4 tsp. vanilla

Heat the milk in a heavy-bottomed pan until very hot but not boiling.  Mix the sugar, flour, and salt together in a bowl, stir in the hot milk, and beat until well blended.  Pour back into the pan and continue to stir vigorously over low heat for 4-5 minutes, until very thick and smooth.  Add the egg yolks and cook for a few more minutes.  Cool, stirring from time to time, then add the vanilla.

Cool completely in the refrigerator (or, if you're strapped for time like Millie was, in the freezer) before folding in freshly whipped cream.  Whip 3/4 pint of heavy cream (reserving the remaining 1/4 pint) until soft peaks form and gradually add sugar, to taste, until stiff peaks form.  Fold the whipped cream into the chilled crème pâtissière, and then place a hearty dollop of the filling onto each cooled cream puff before replacing the tops.

Chocolate Ganache Topping

Take the remaining 1/4 pint of heavy cream and heat it together with a cup or so of semisweet chocolate chips.  (We use the microwave for this.  Just heat it for 30 seconds and then in increments of 10 seconds to avoid scorching it.)  Stir together until melted and smooth.  Allow it to cool and thicken a bit until it's the right consistency for topping your cream puffs.  Melt in a few more chocolate chips if it seems too thin. Allow topping to cool and then dig in.

Note: They are best eaten fresh, as they tend to become soggy when stored in the refrigerator.

These are unbelievable, but don't give yourself a bellyache. 
(And if you do, don't say I didn't warn you.)

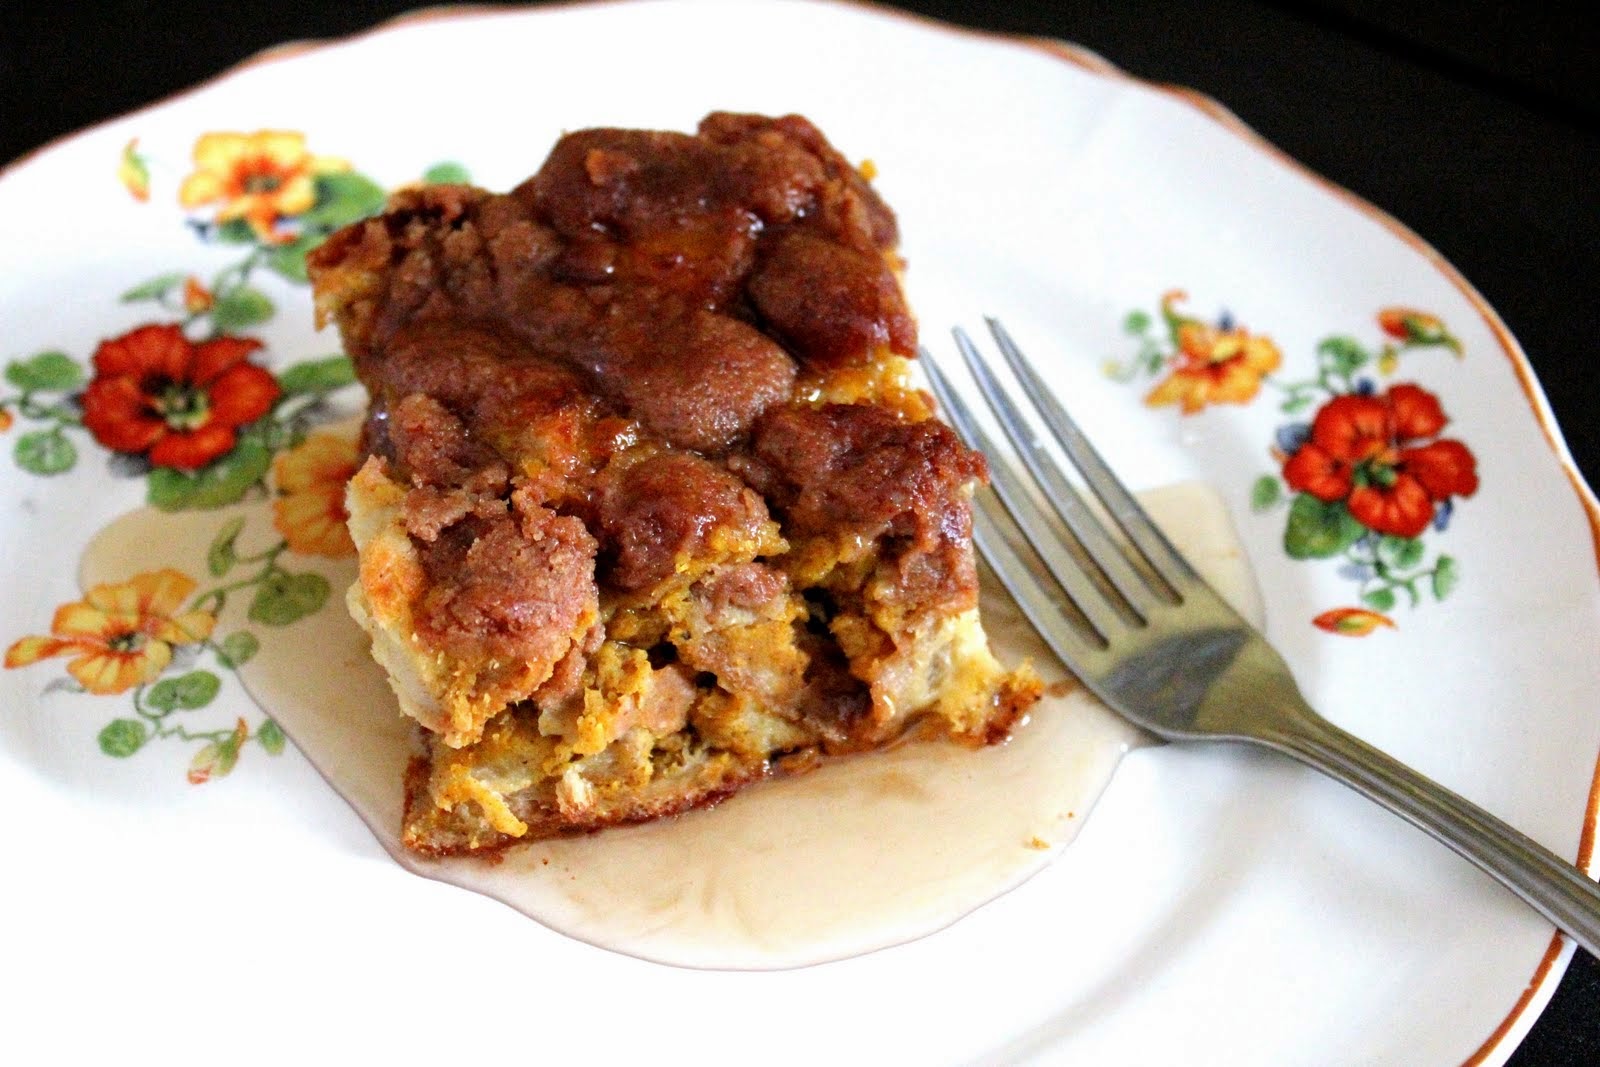
Baked Pumpkin Spice French Toast


Since we omit sweet scones, muffins, and pancakes during Lent, also, I've made sweet breakfasts the last couple of Sunday mornings. Usually, on Sundays, we're scrambling around like mad and eat oatmeal or something equally fast and easy, so this thrills the girls.  This breakfast is perfect because it's assembled the night before.  In the morning, you can pop it in the oven for about 45 minutes for an easy breakfast.

I winged this, because baked French toast dishes, like savory stratas, are hard to ruin as long as you add enough eggs and liquid to soak the bread.  Here's the recipe, to the best of my memory.  Don't fret.  Remember, baked French toast is hard to ruin!

Also, I used a high ratio of pureed pumpkin to milk simply because I have so much in my freezer to use up, but if you're using canned pumpkin, you can substitute milk (or heavy cream, if you're so lucky!) for some of the pumpkin if you need to.

Baked Pumpkin Spice French Toast

-About 1 and 1/4 loaf rustic Vienna bread, cut or torn into one inch cubes (you can use French or Italian bread, too.  Just tear enough to fill a 13X9 baking dish.)
- 1 and 1/2 cups milk
- 3 to 4 cups pureed pumpkin
- 6 large eggs, slightly beaten
- 2/3 cup granulated sugar
- 1-2 tbsp. vanilla extract.  (My homemade stuff is in a quart jar, and I just dumped in a large glug.)
- 2-3 tsp. ground cinnamon
- 1/4 tsp. ground cloves
- 1/2 tsp. ground nutmeg
- a pinch of ground ginger

Crumble Topping:
1/2 cup flour
1/2 cup packed brown sugar
2 tsp. cinnamon
1/4 tsp. nutmeg
pinch of cloves
1 stick cold butter (8 tbsp.)

For the French toast, arrange the bread cubes in a greased 13 x 9 baking dish.  Combine the remaining ingredients and mix until smooth, then pour over the bread cubes, making sure they're all saturated.  Cover and place in refrigerator overnight.  Meanwhile, assemble the crumble topping by mixing together the dry ingredients and then cutting in the cold butter until the mixture is formed in crumbles about the size of small peas.  In the morning, preheat the oven to 350 degrees, top the French toast with the crumble topping, and bake for about 45 minutes or until a knife inserted in the center comes out clean.